Notice how Aaron keeps lightly shaking the can in the video — pros do this instinctively to keep the pigments evenly mixed and ready to atomize cleanly.
Before You Begin
Safety
Wear nitrile gloves, protective eyewear, protective clothing, and a dual cartridge respirator rated for paint fumes.
Avoid contact with eyes or prolonged skin exposure.
Ventilation
Work in a well-ventilated area with gentle airflow, and avoid enclosed spaces or direct wind.
Keep paint aerosols away from children, pets, open flames, heaters, and ignition sources.
Surface Protection
Temperature & Humidity
Apply paint between 65°F/18°C and 75°F/24°C and under 50% humidity.
Avoid direct sun, rain, or hot or cold panels.
Drying times will be affected by temperatures above or below this range.
Low temperature will slow drying times.
Cold temperatures are not recommended.
Storage & Disposal
Store cans and small items away from direct sunlight, high heat and a cool dry area that won't freeze.
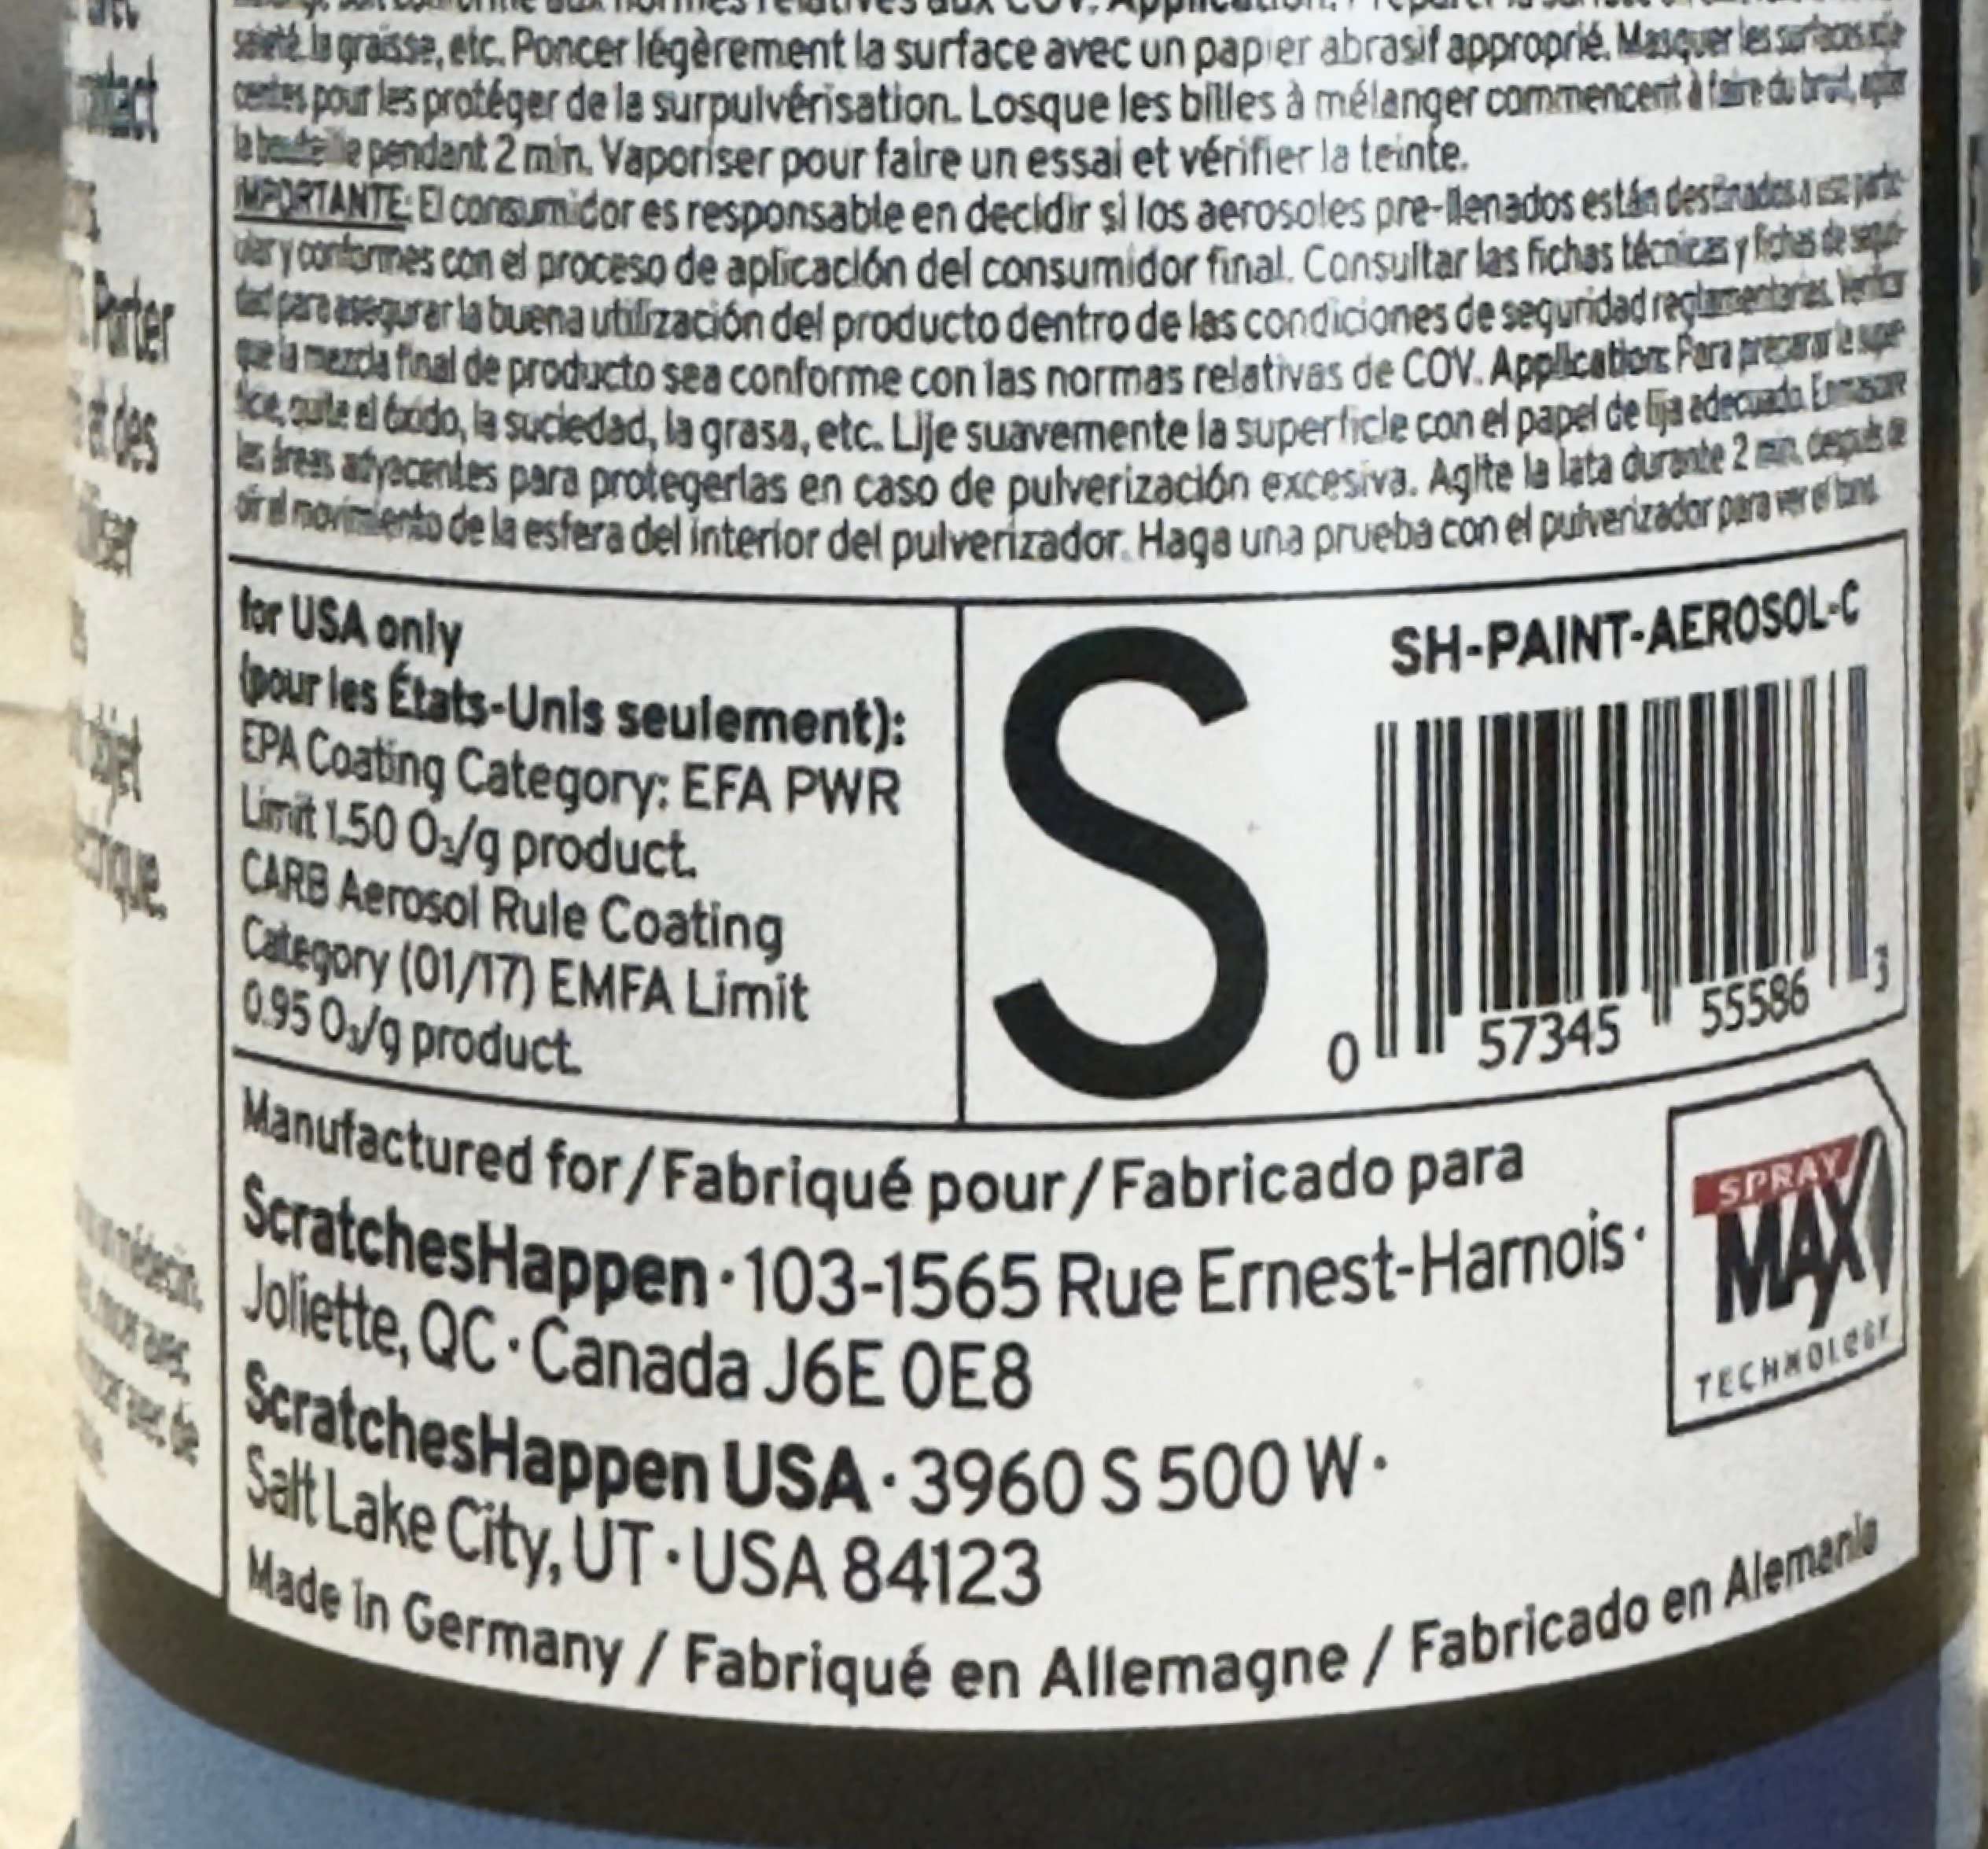
Color paint washes off with warm water and soap — except if the can has an “S” code on the back, in which case it is solventborne paint and should be cleaned with paint thinner.
Primer and clear coat wash off with paint thinner.
Dispose of empty cans responsibly.
Aerosol Paint SOP
Always spray a quick nozzle test before starting to spray your vehicle to confirm a clean, even atomization, with no splatter or blobs.
To check dryness between coats, lightly tap the masking tape at the edge of the sprayed area instead of touching the repair.
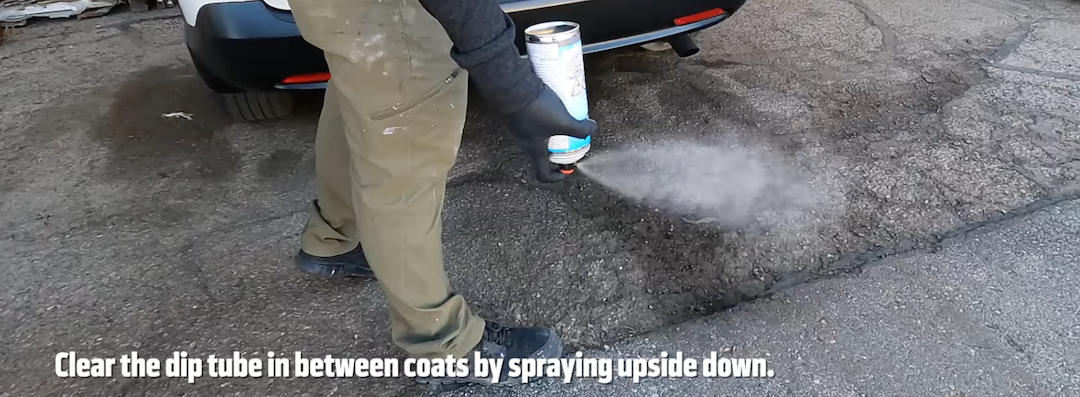
After spraying, turn the can upside down and spray briefly to unclog/clear the nozzle and dip tube for the next coat.
Do not use paint thinner on your vehicle’s painted panels.
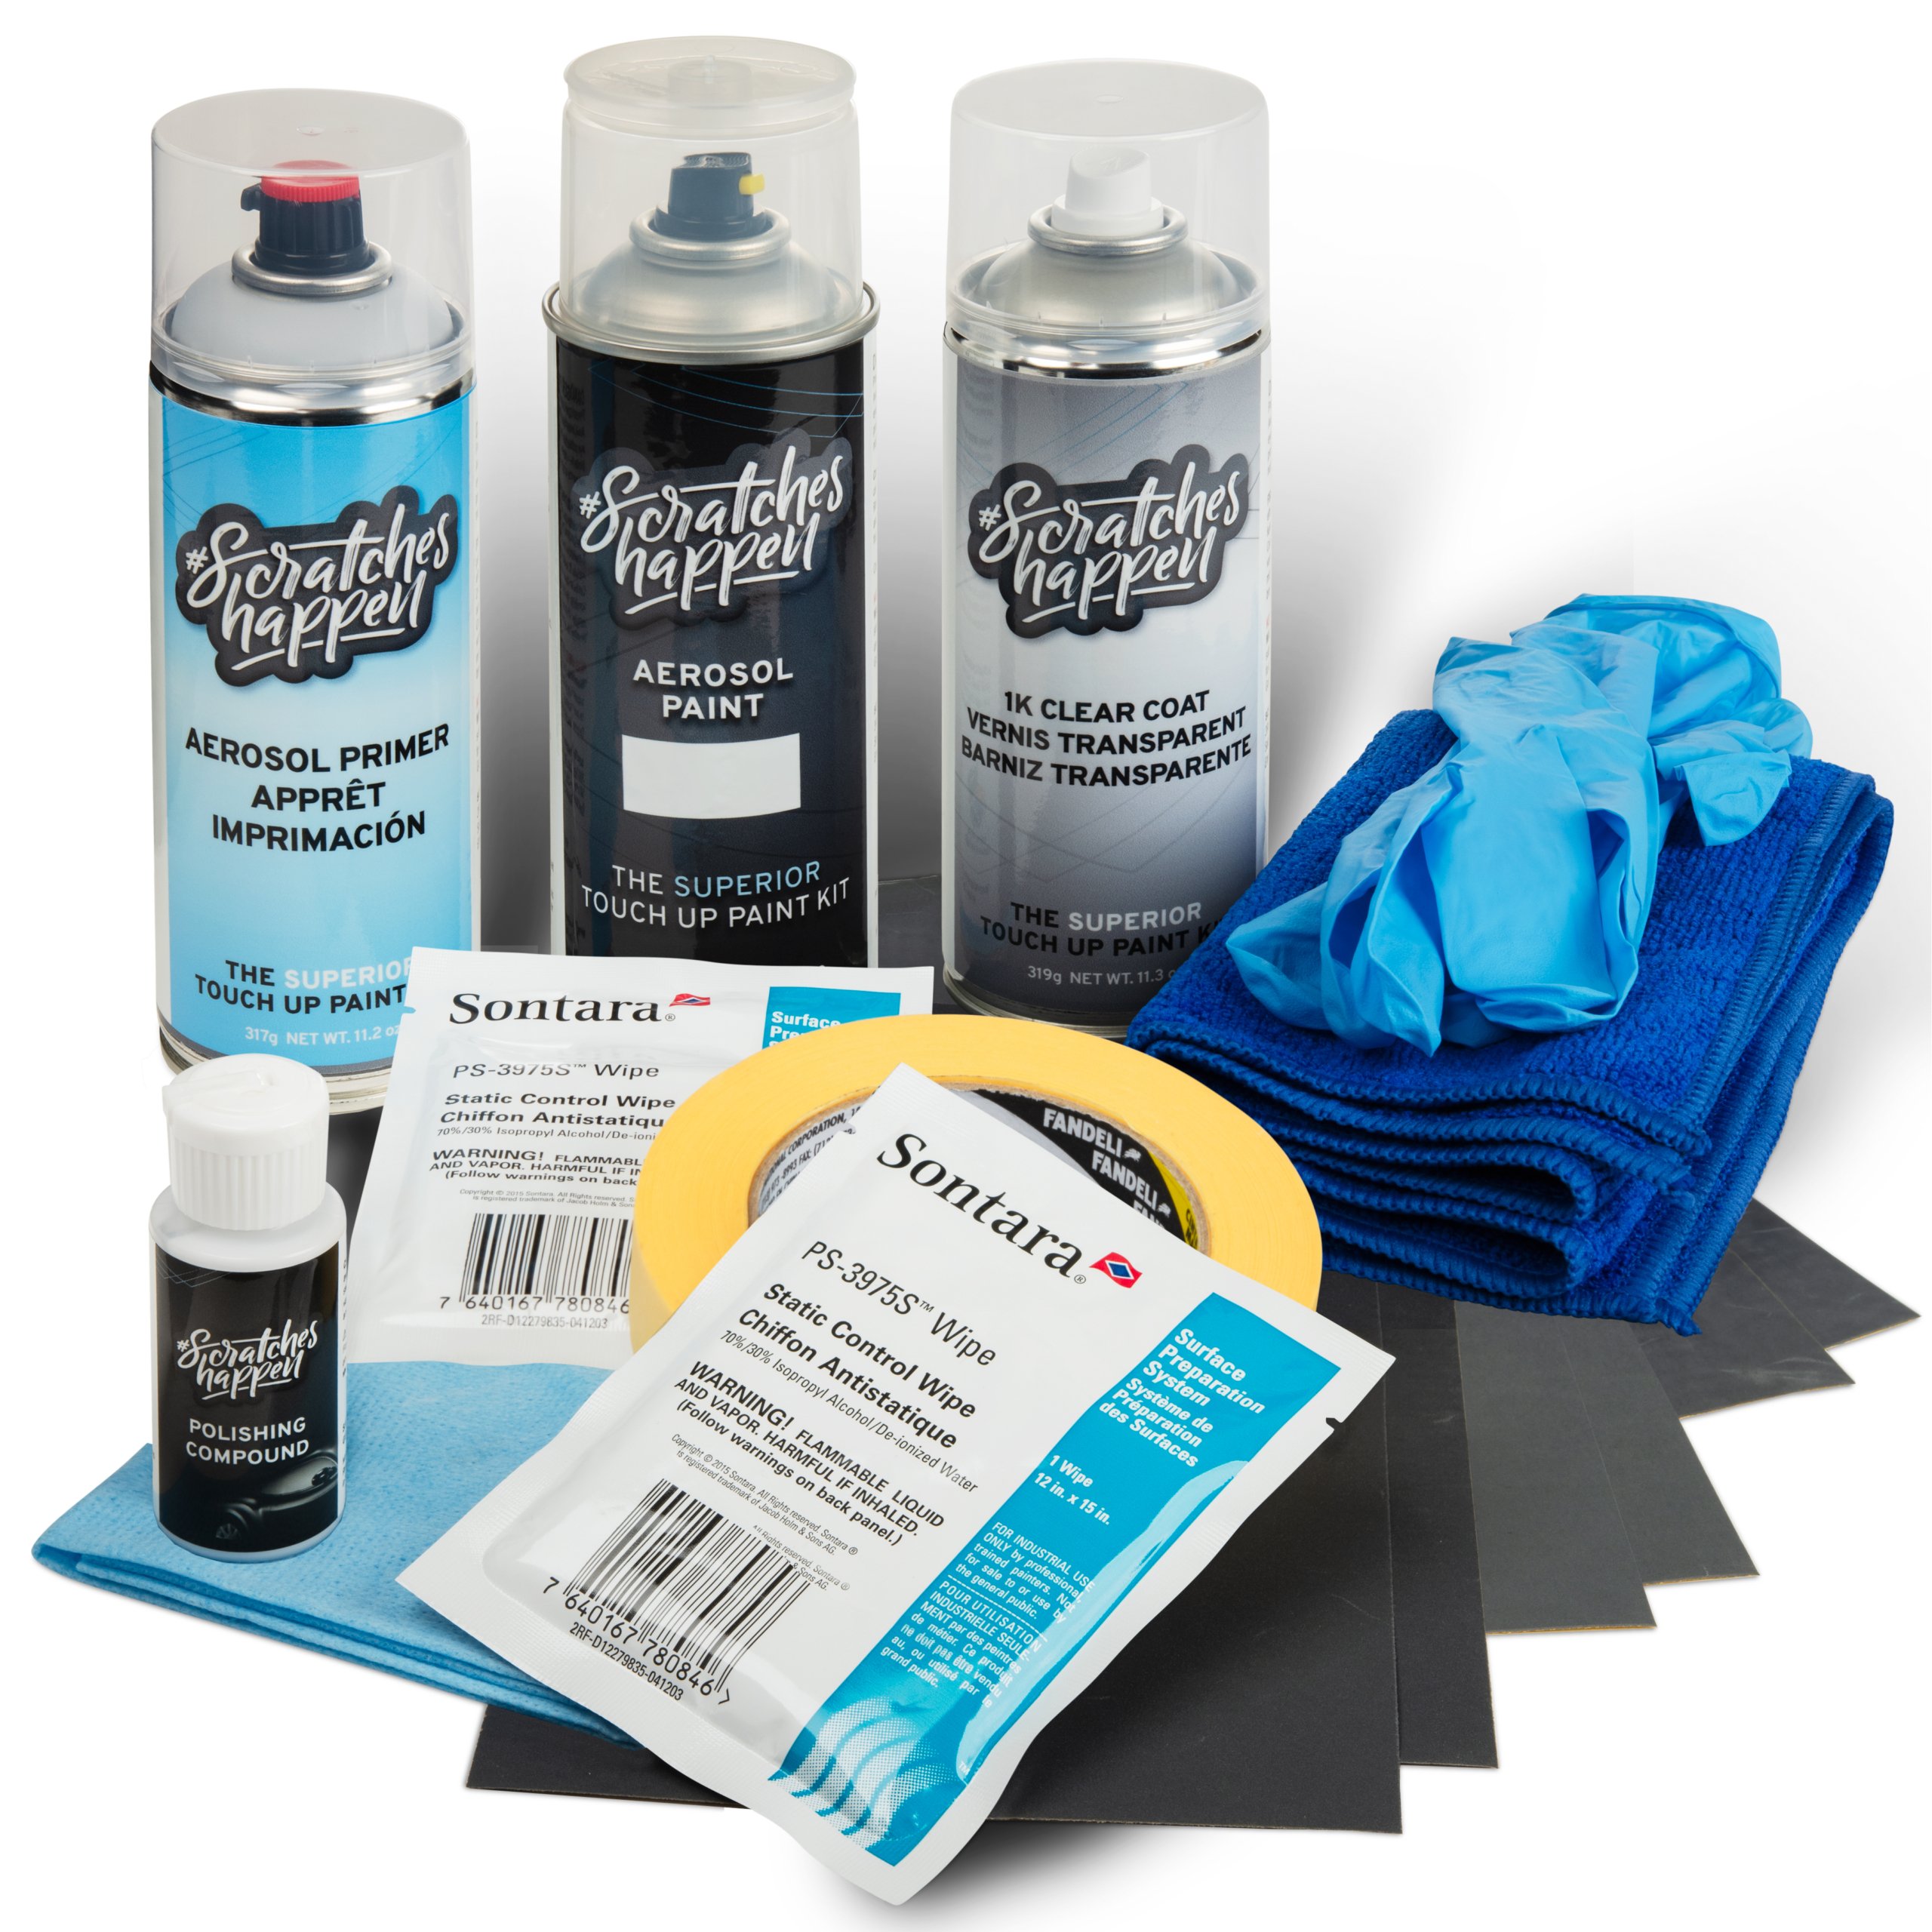
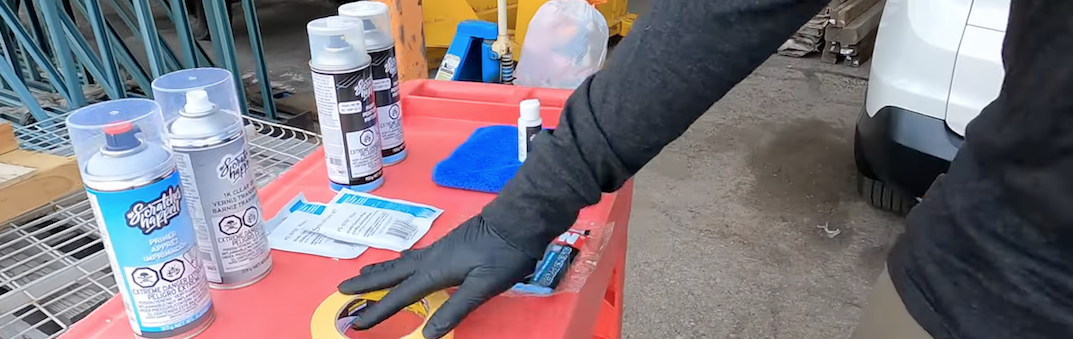
Gather Your Tools
Check off each item before you begin.
Required
Gloves and test card
Prep wipes or isopropyl alcohol
Tack cloth or some sticky tape
Sandpaper (600, 1000, 1500, 2000 grit)
Masking tape and masking paper / newspaper
Microfiber towel (plus extra lint-free rags)
Flashlight or handheld LED light (phone light)
Watch or timer
Washing supplies, including paint thinner
Optional (Helpful Extras)
Bucket of water (for wet sanding)
Drop cloth or plastic sheeting
Small portable fan or hairdryer
Compressed air can
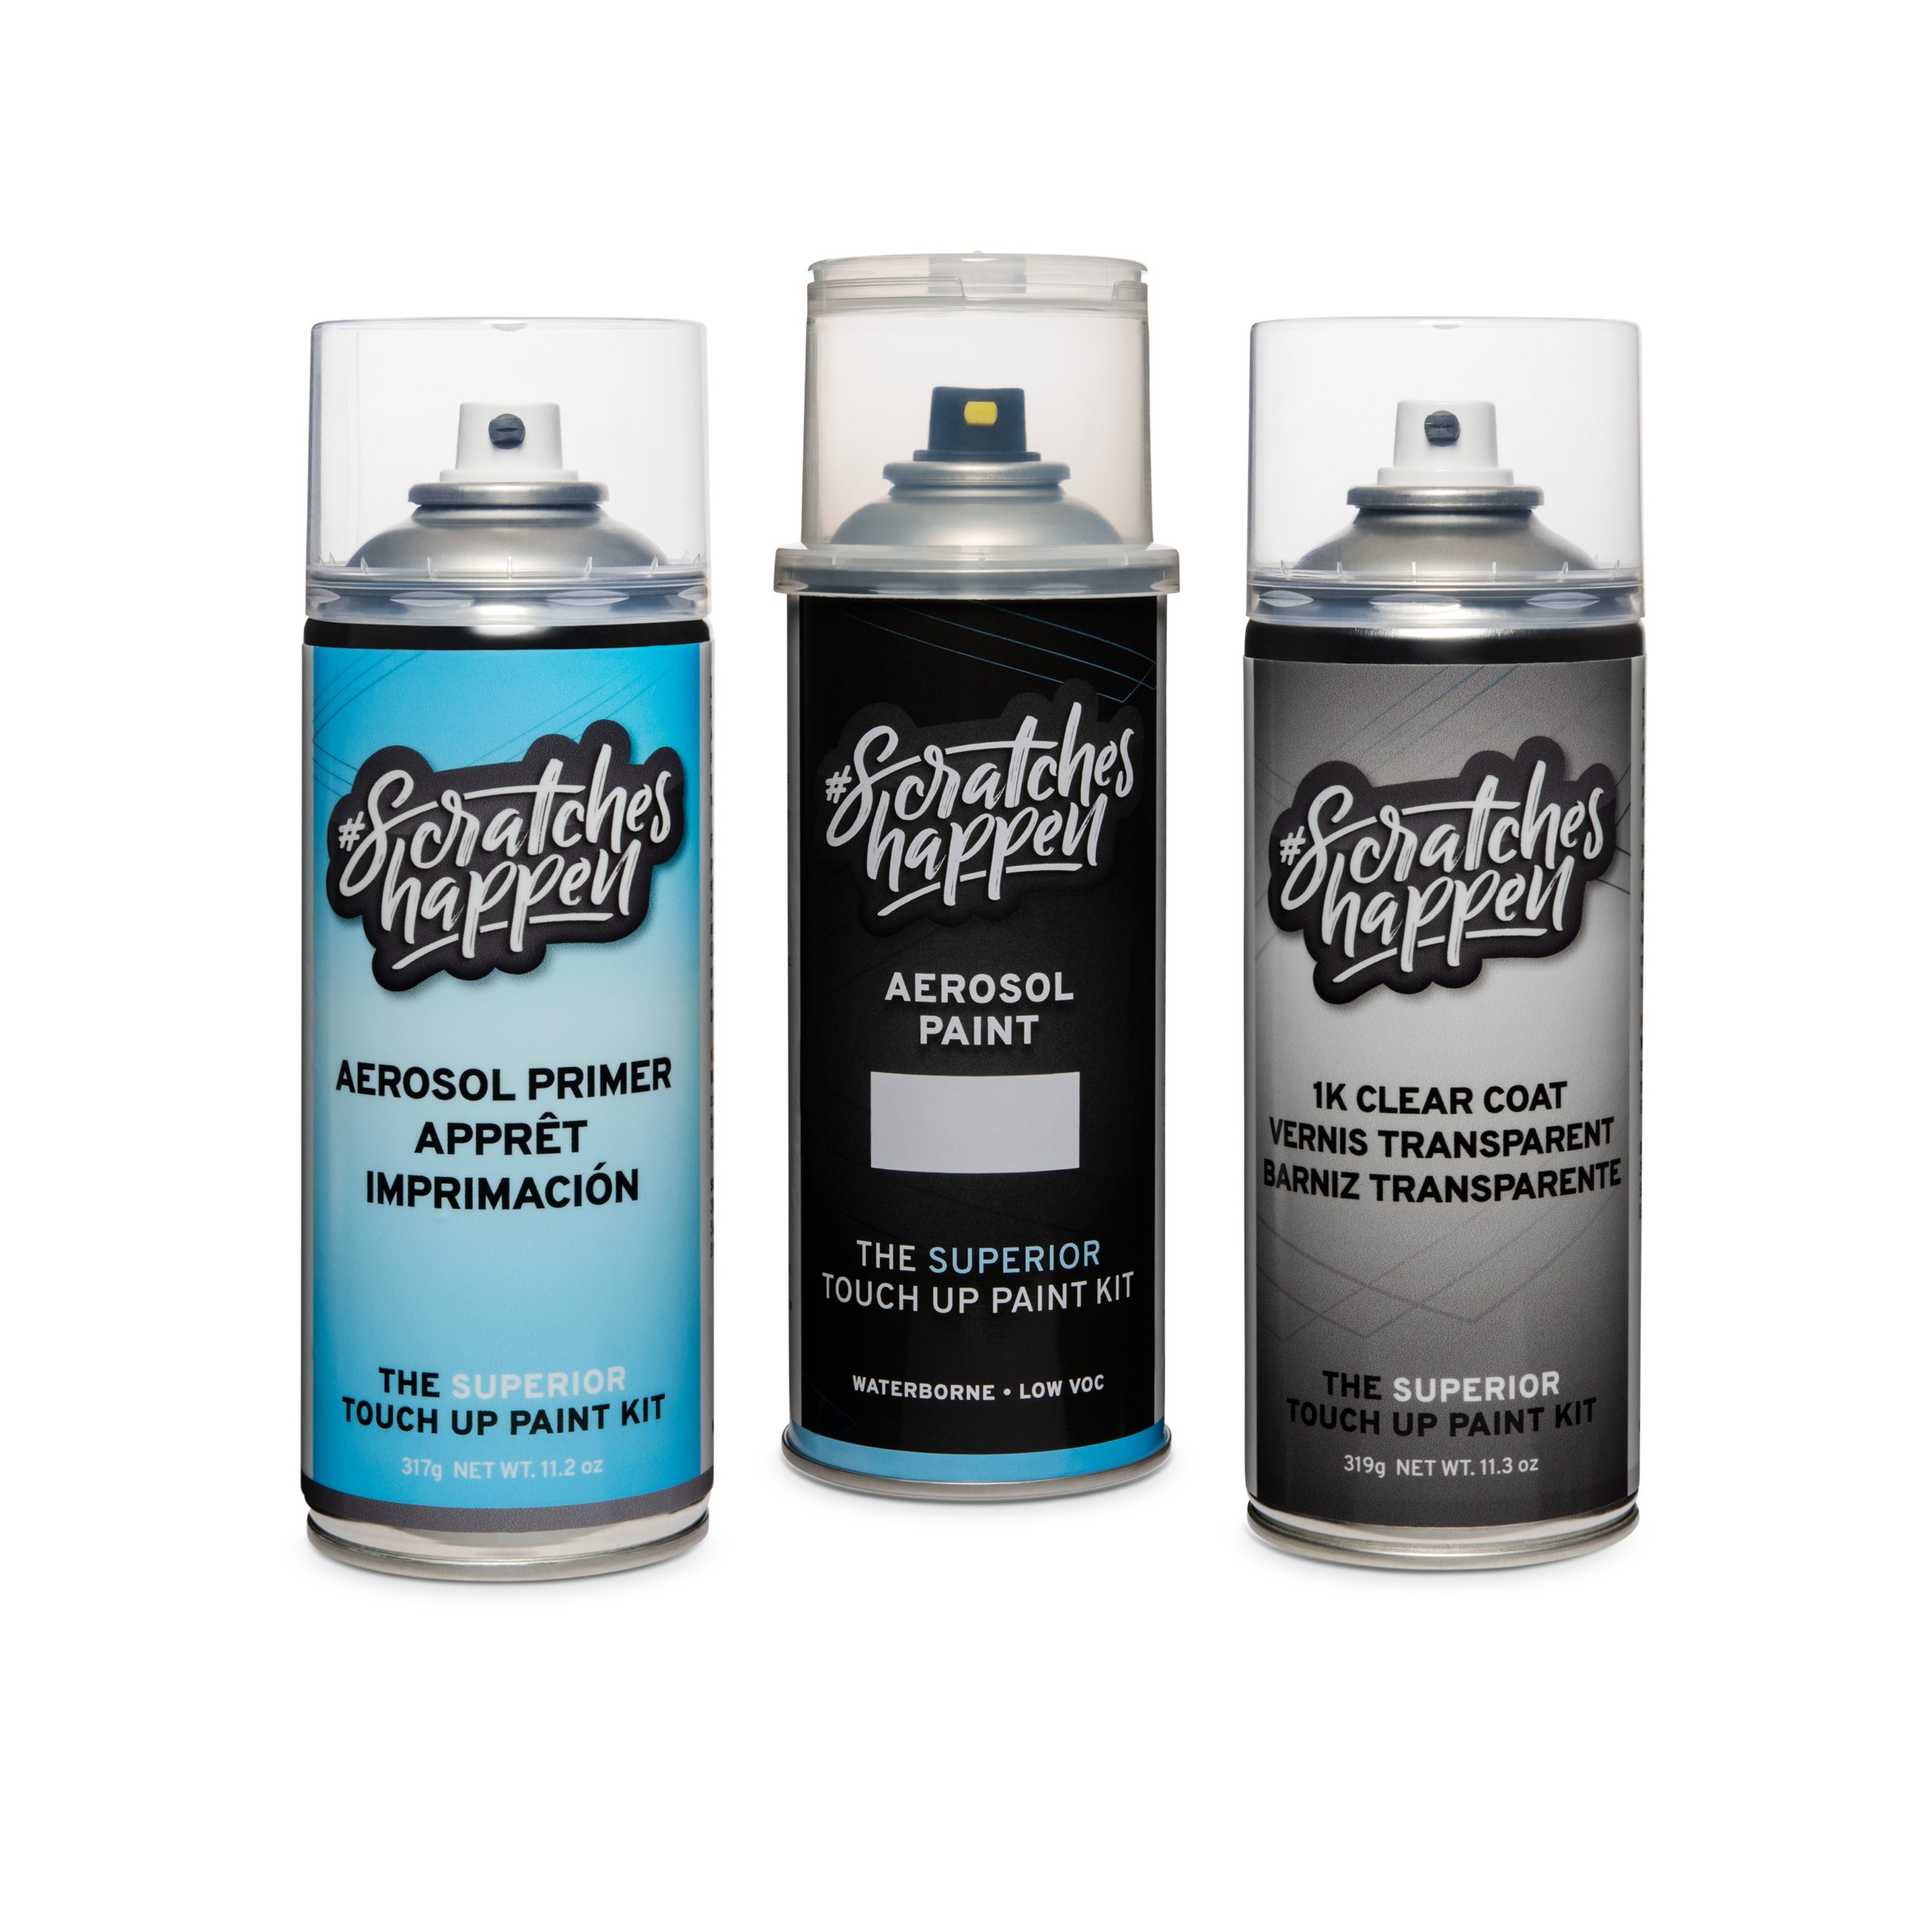
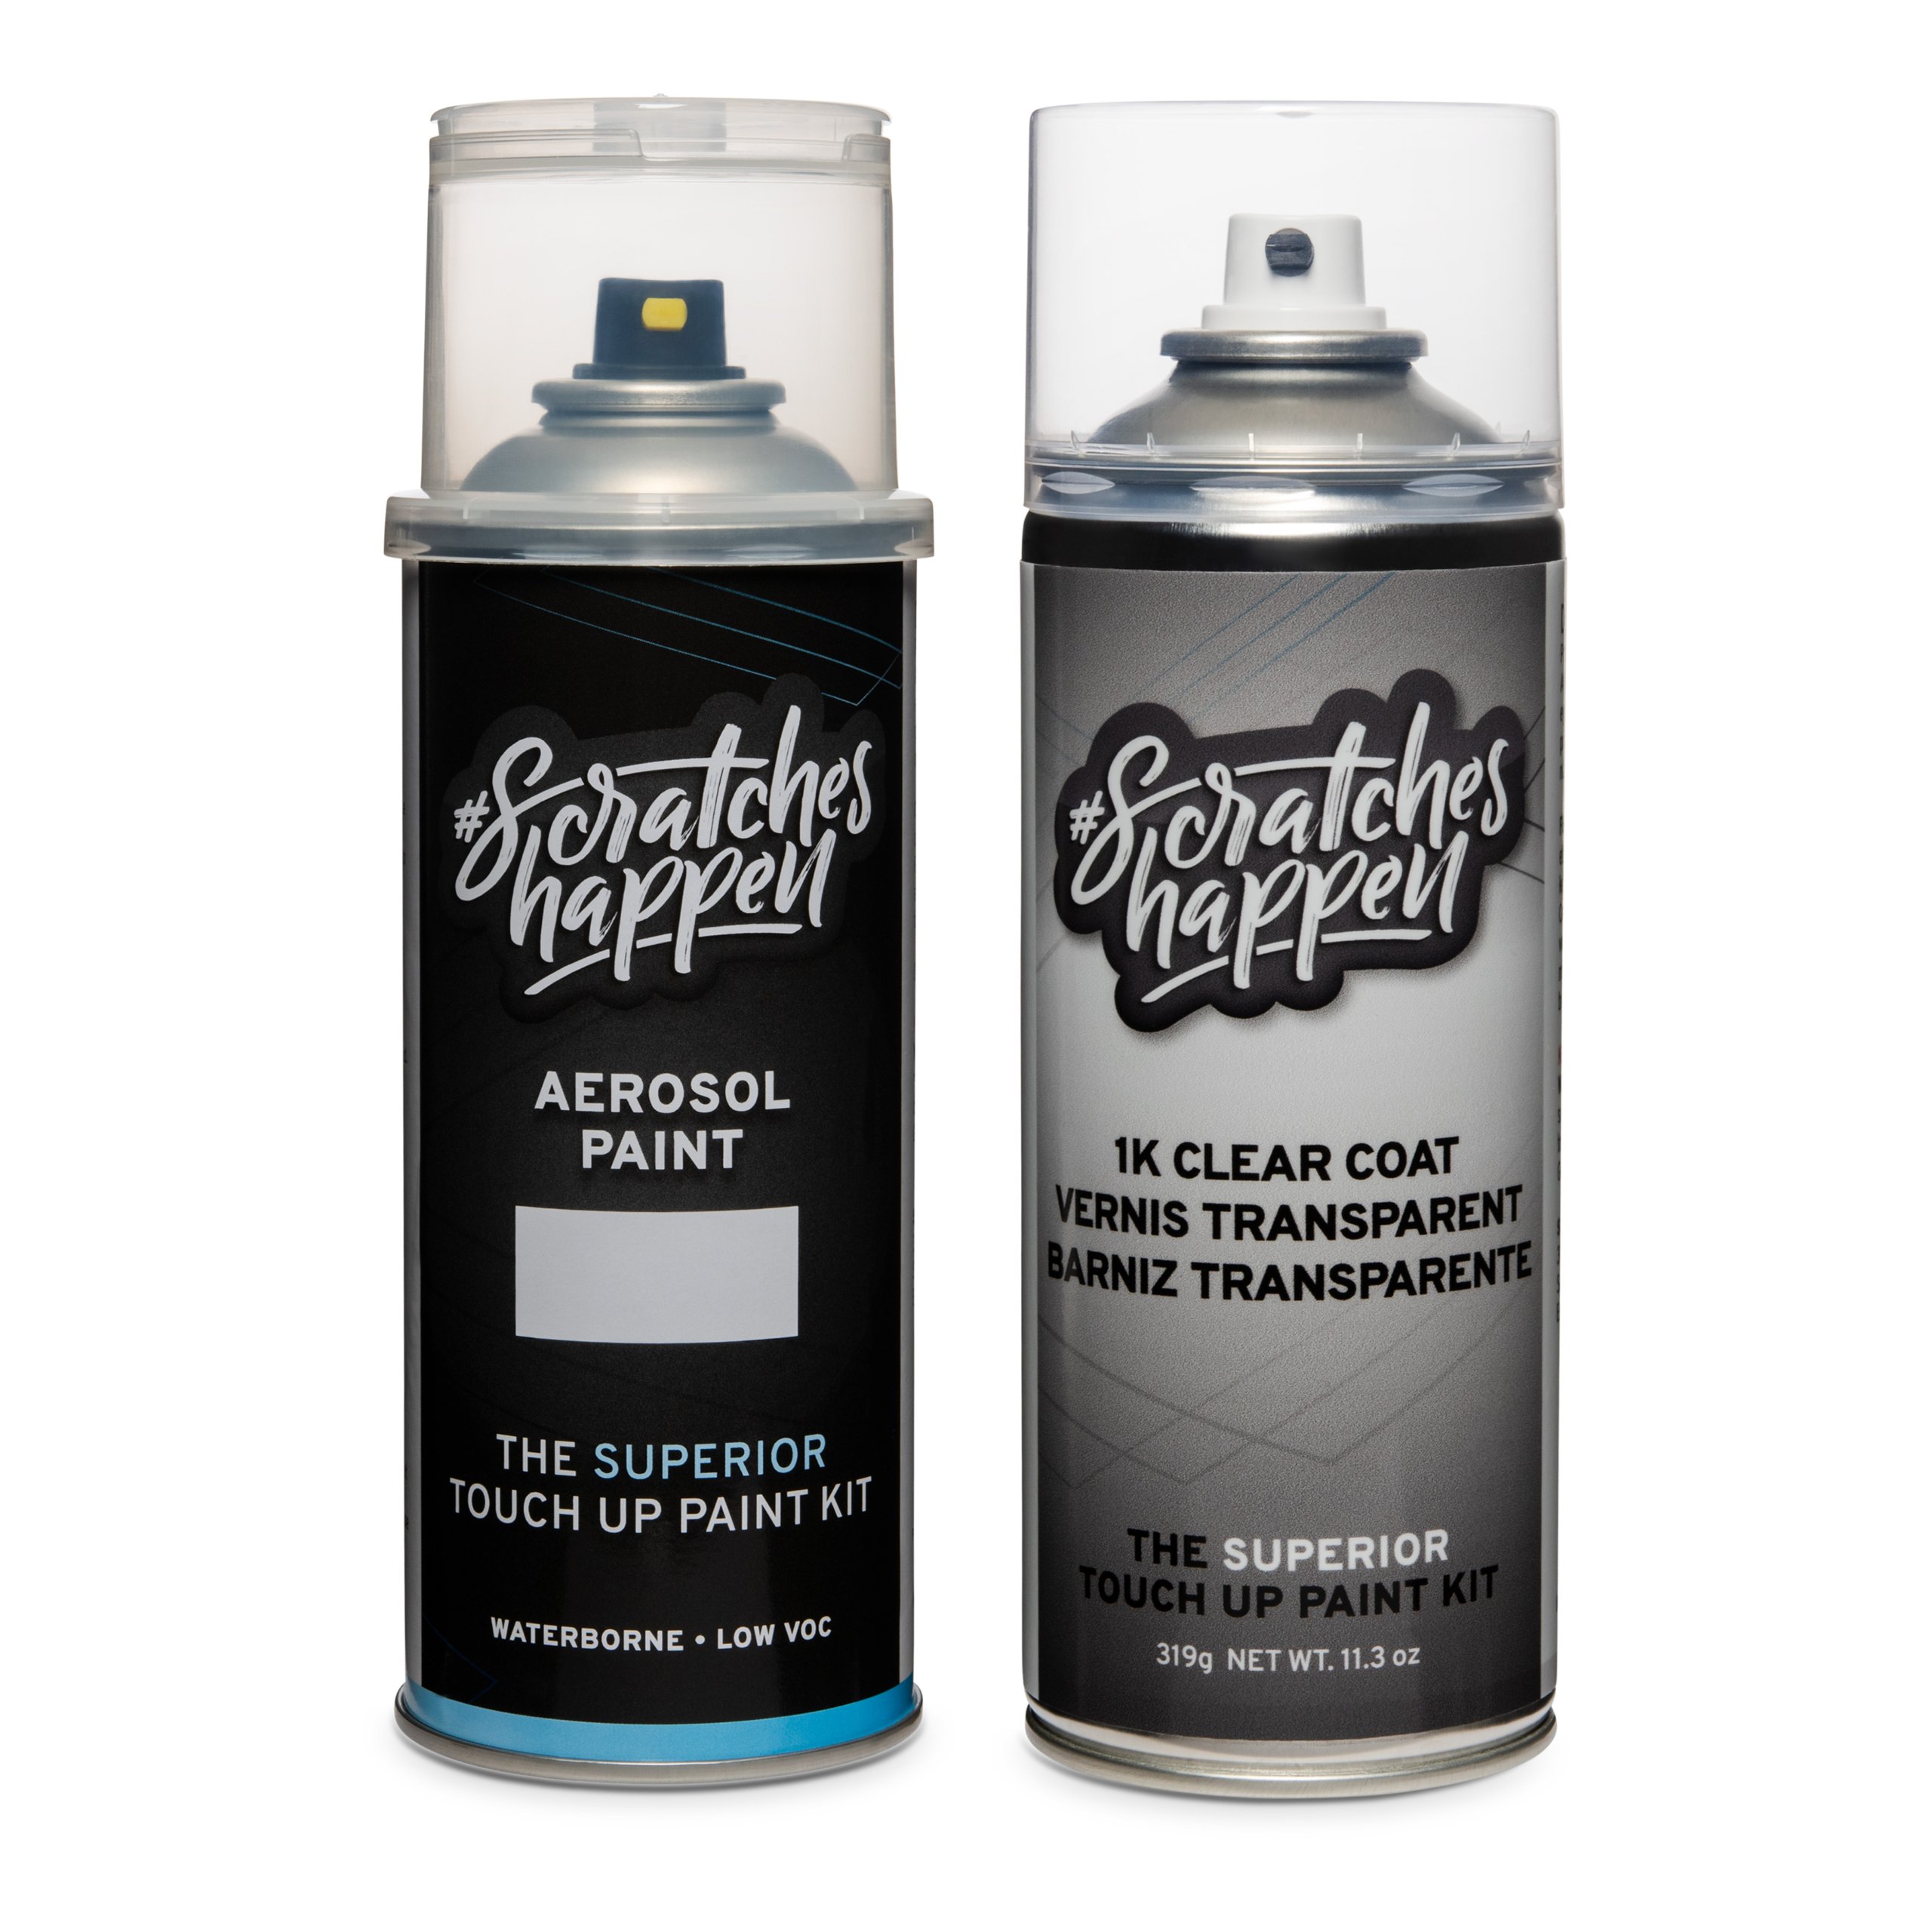
Which Kit Do I Have?
Find your kit below to see what’s included. Every kit includes the paint and clear coat. When an item, such as sandpaper, is helpful, the instructions will note it clearly.
Aerosol Complete | Aerosol Preferred | Aerosol Essential |
|
|
|
Includes: | Includes: | Includes: |
Paint Type Guide (Before You Begin Painting)
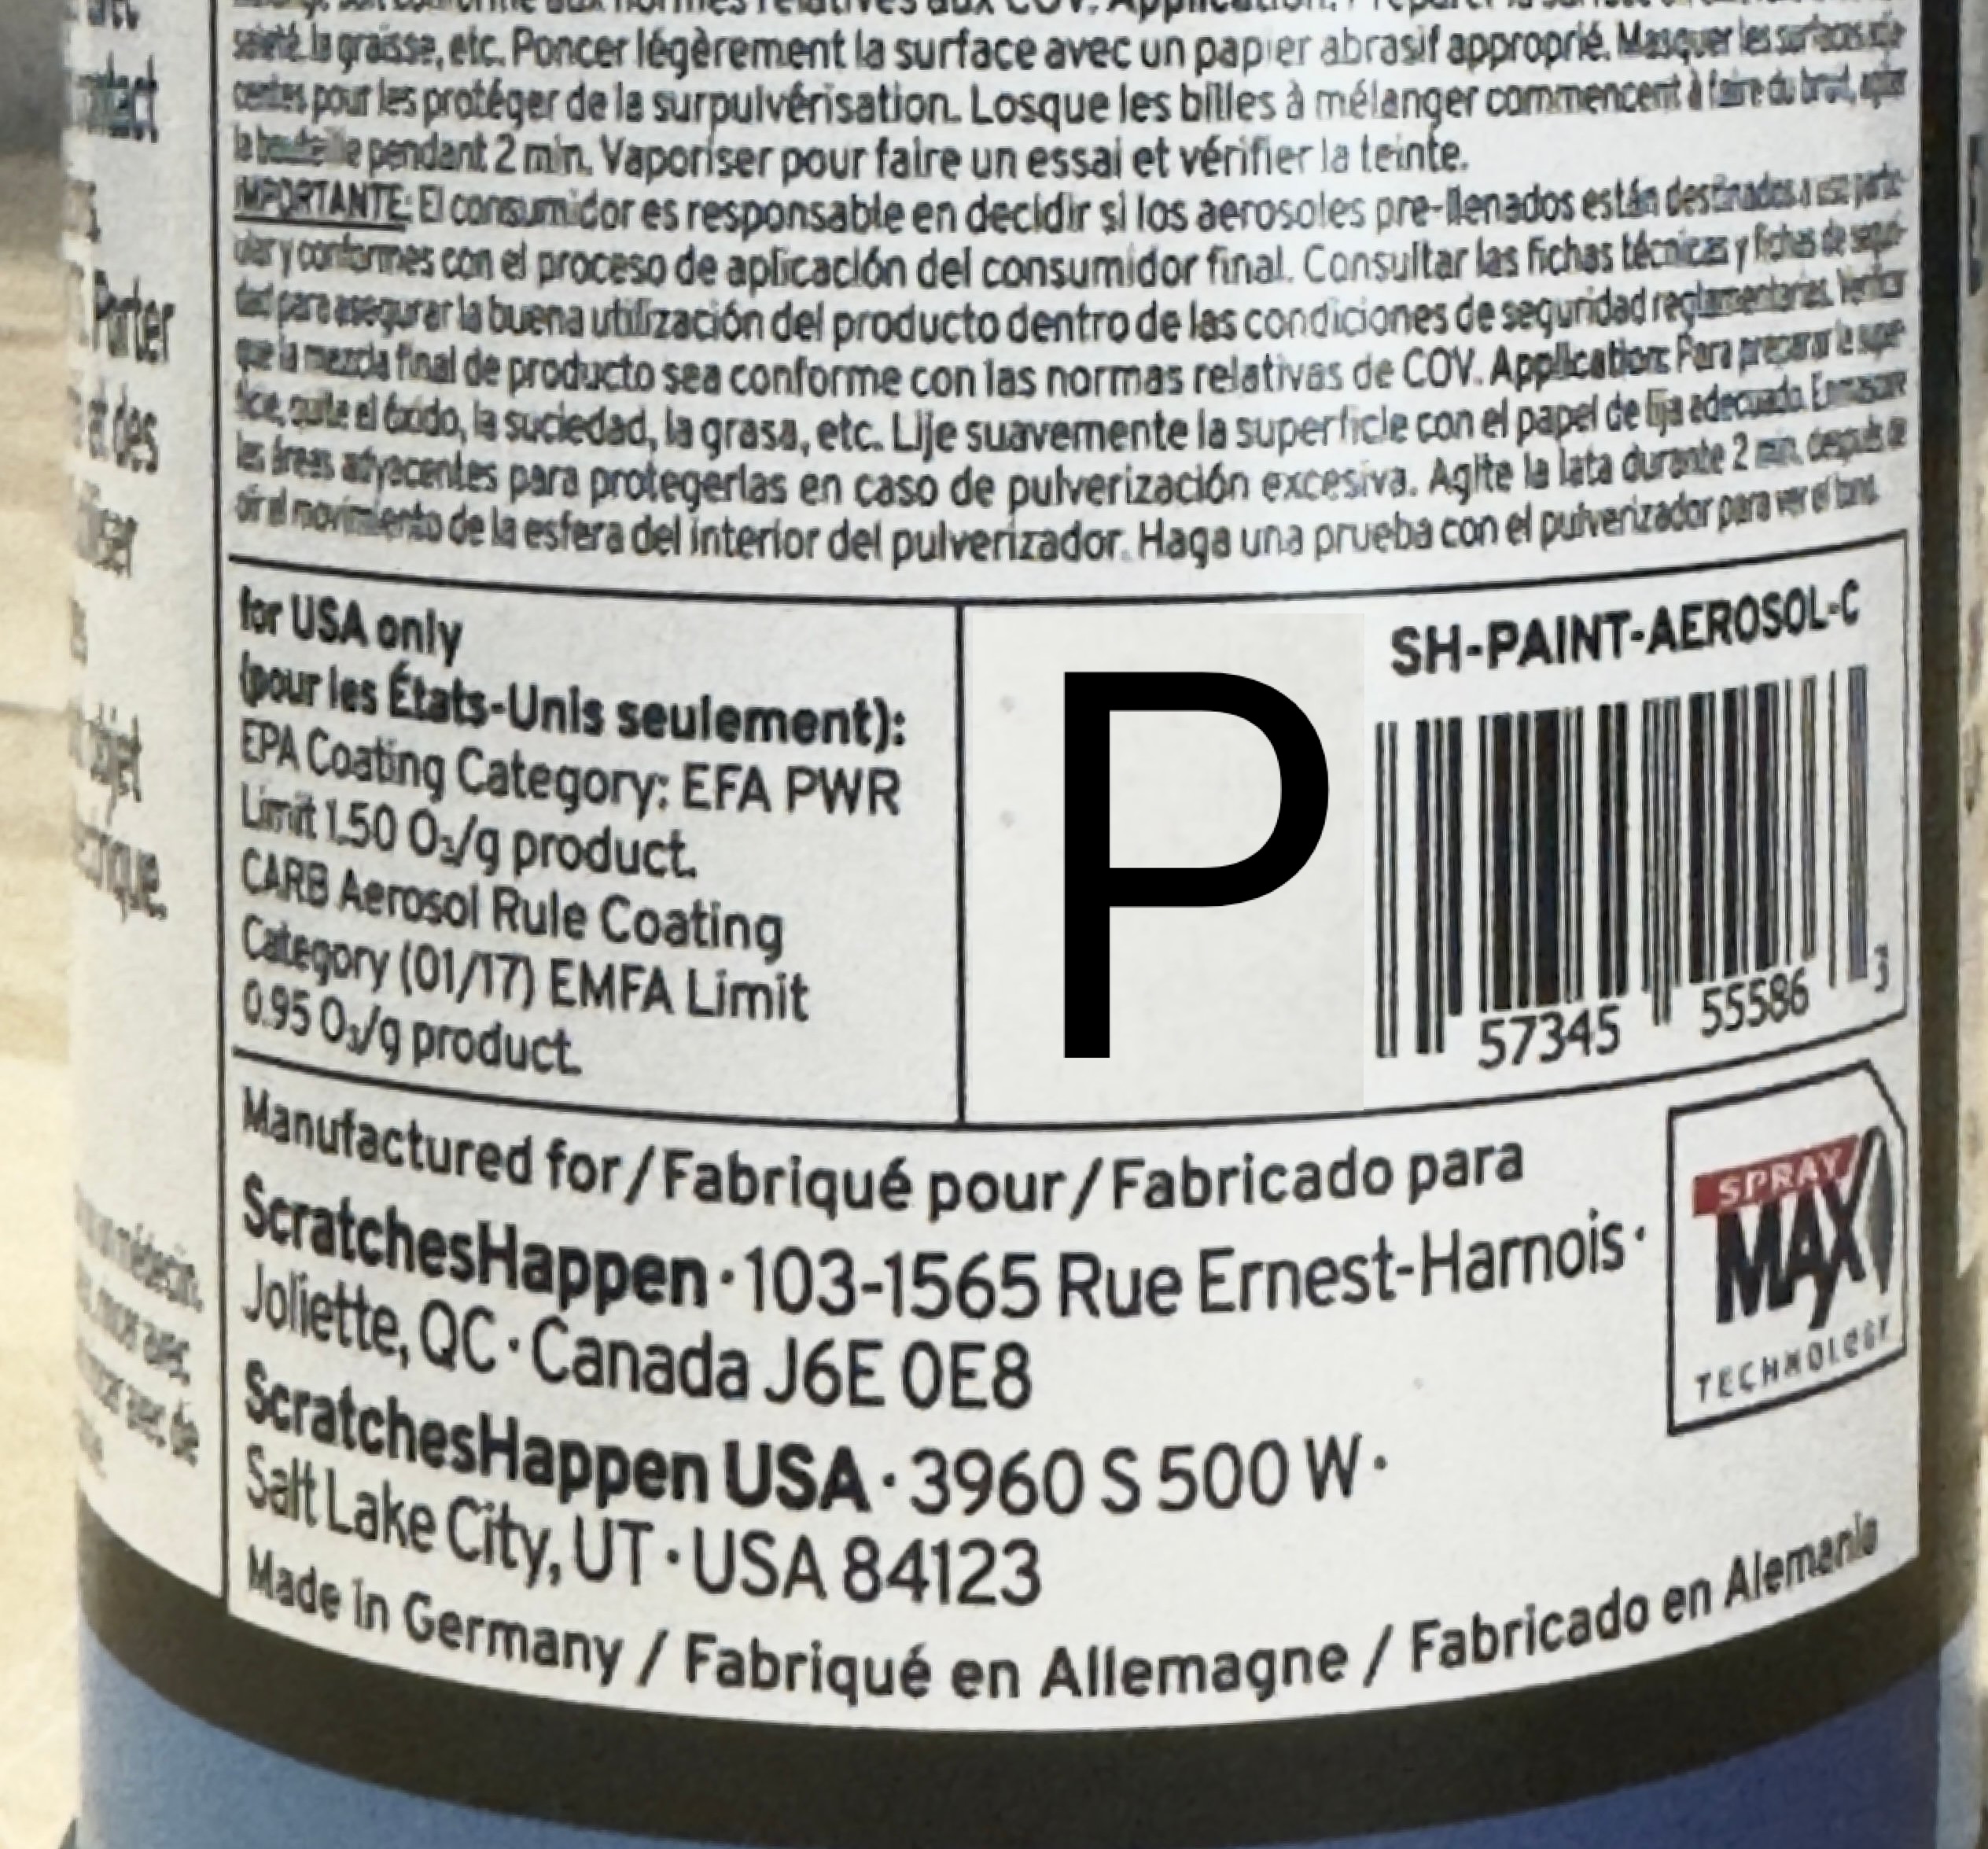
Do a simple lookup to see if you have solventborne paint or waterborne paint. The only differences are in sanding, drying, and clean-up. Look at the letter printed on the back of the color can (the “color coat”).
Solventborne
Labeled with an S - shown below
Do not use a hairdryer
Paint layers can be wet- or dry-sanded
Same application steps as waterborne, just different drying behavior
Waterborne
Labeled with P, I, or U - shown below
Hairdryer (no heat) may be used from 18 inches
Paint layers can be lightly spot dry-sanded only to remove imperfections
Normal for the color to look slightly blue/grey/green when wet
Solventborne | Waterborne | Waterborne | Waterborne |
|
|
|
|
“S” = solventborne paint | "P" = waterborne paint | "I" = waterborne paint | "U" = waterborne paint |

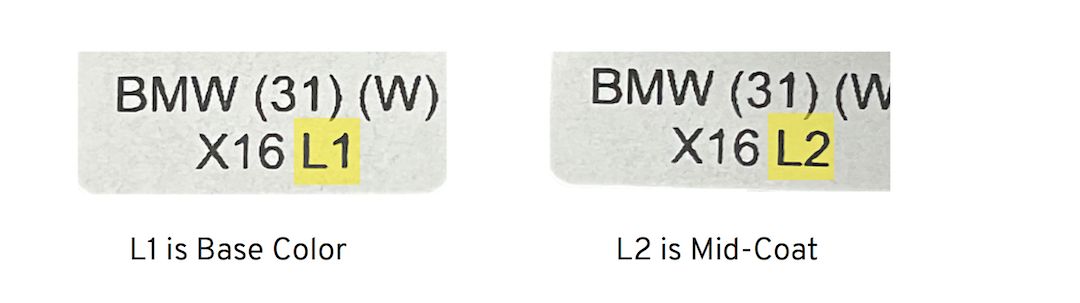
Tri-Coat Colors (L1 and L2)
Some OEM colors — common in pearl whites, some reds, and specialty finishes — use a two-layer color system to get their full depth and effect.
These are called tri-coat colors. If your color is tri-coat, your kit includes two color cans instead of one:
L1 – Base Color
L2 – Mid-Coat Color You’ll apply L1 coats first, let them dry, then follow with L2 coats. (These instructions walk you through this automatically — nothing extra to learn.)
Metallic and Pearl Colors
These colors contain reflective flakes that make the finish shift slightly depending on lighting and viewing angle.
This is normal and part of the factory effect. No special products needed — just follow the “control coat” step when you get to it.
Control (or Drop/Top) Coats
Metallic, pearl, and some tri-coat L2 colors use reflective flakes that create depth and sparkle. A control coat is a light finishing pass that helps those flakes settle evenly for a factory-like look.
You’ll only use this if your color is metallic, pearl, or the tri-coat L2 coat — these instructions will tell you when.
Before/After Photos
Take clear photos before you begin — they can help us diagnose any application questions later.
Drying & Flash-Time Reference
Standard drying times at 65–75°F (18–24°C) and under 50% humidity. Tap to expand any timing below.
Between primer coats
5-10 minutes, but up to 30 minutes depending on film thickness, temperature and humidity
After primer, before painting
60 minutes–24 hours
Between base color coats
10–20 minutes, but up to 30 minutes depending on film thickness, temperature and humidity
After base color, before clear coat
60 minutes–24 hours
Between clear coats
5-10 minutes, but up to 30 minutes depending on film thickness, temperature and humidity
After clear coat, before wet sand/polish
72 hours
After clear coat, before hand wash
72 hours
After clear coat, before machine wash
30 days
After clear coat, before waxing
30 days
Before ceramic/film wrap
60 days
Adhesion between primer + base color + clear coat Each of these coatings has a porous surface when freshly dried. That porosity allows the next coating to adhere properly through chemical bonding. As the surface hardens, that porosity closes.
If no sanding, wiping, or surface alteration occurred between layers, transitions from primer → base color or from base color → clear coat should happen within 24 hours.
If more than 24 hours passes, the dried coating may not accept the next layer correctly.
In that case, apply one light refresher coat of the previous layer and continue within 24 hours. This guidance applies when the surface was left untouched between layers.
STEP 1: Prepare the Surface
Clean, sand, and mask the repair area so new coatings bond correctly.
Part A — Sand the Repair Area
• Smooth the repair, remove loose paint and light rust, and lightly scuff surrounding clear coat to promote adhesion.
• Hand sanding is fine; a dual action orbital sander is optional for large panels.
• Feather transitions between heavily and lightly sanded zones.
• If scratches remain, prep with 80-grit, apply spot putty, wet-sand with 320-grit, then refine with 600-grit.
• Maintain the natural contour of the panel while sanding.
After-market replacement bare plastic parts: Medium to large bare plastic parts require adhesion promoter be applied over the bare plastic and underneath the primer to help the primer bond to larger areas of bare plastic.
Part B — Wash and Dry
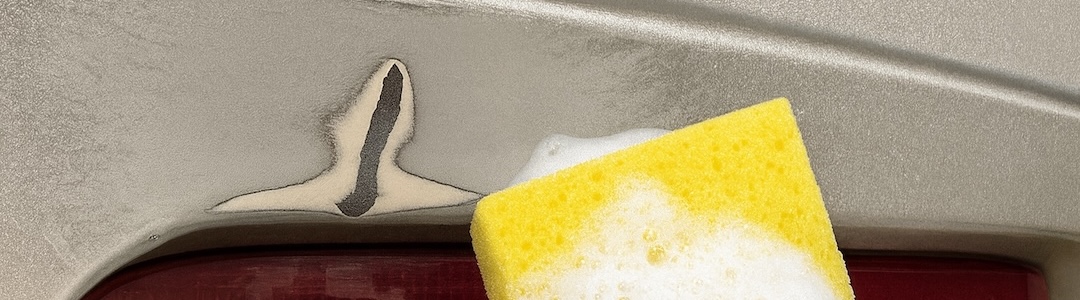
Remove grease, residue, and sanding dust so the surface is clean and uniform. Dawn detergent or similar is fine.
Ensure no soap film or debris remains.
Clear seams using compressed air or a hairdryer on high (no heat). The area must be fully dry before masking.
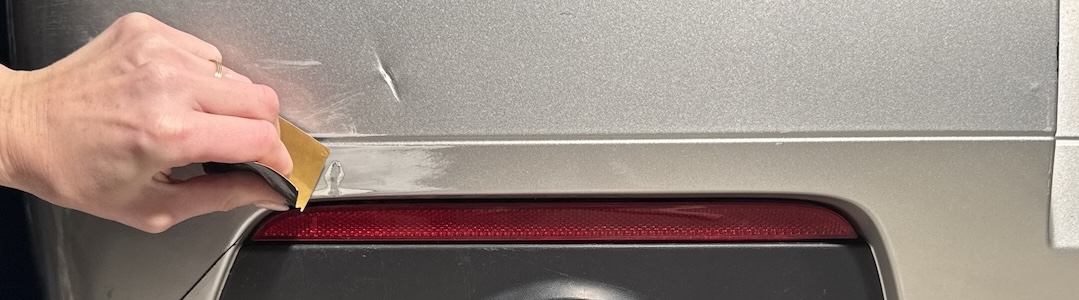
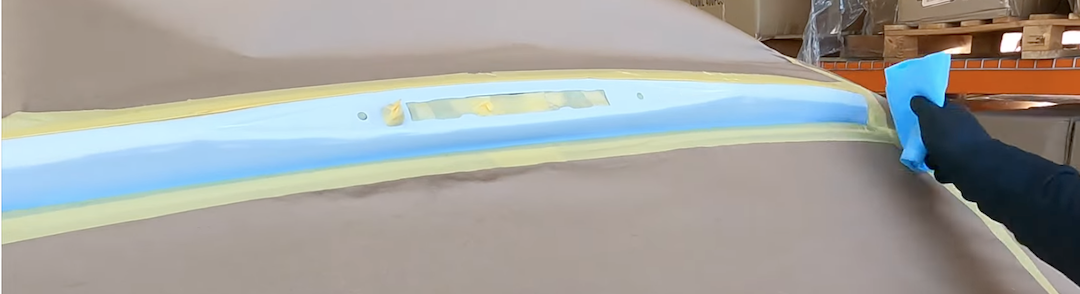
Part C — Mask the Area
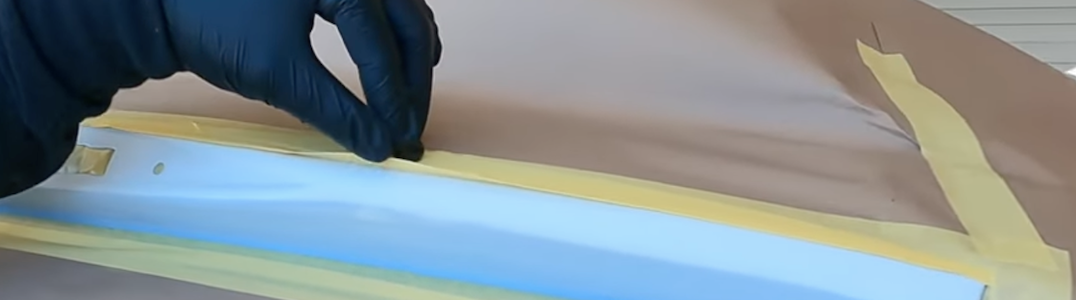
Masking protects nearby vehicle surfaces from overspray. You’ll use tape and paper to control where the paint goes. Video: How to Mask with Tape to Create a Soft Transition Line
The extra space allows room for blending without overspray reaching adjacent surfaces.
Cover trim, windows, door handles, antenna bases, badges, and any nearby panels with paper or plastic.
Fold the tape edge under to avoid a hard paint line and create a smoother transition.
When possible, mask along body lines to avoid a noticeable paint line bisecting a body panel.
Part D — Final Prep
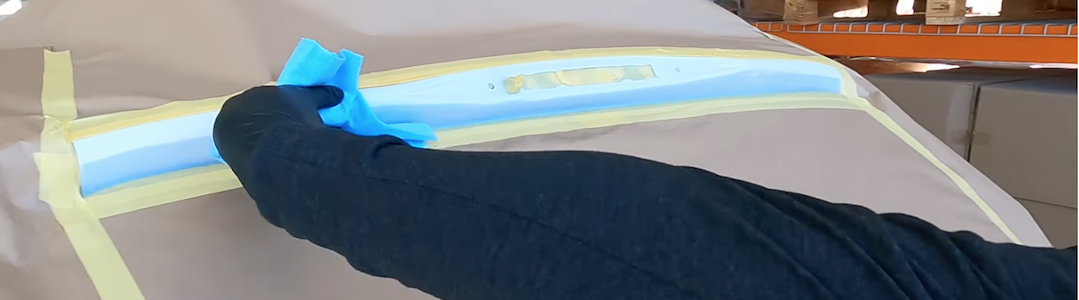
Remove any remaining oils or residue with a prep wipe.
No prep wipe on hand?
Use a mixture of 2/3 water to 1/3 isopropyl alcohol as a good alternative.
Lift dust, lint, and particles with a tack cloth before moving to the test card.
No tack cloth on hand?
Use sticky tape as an alternative.
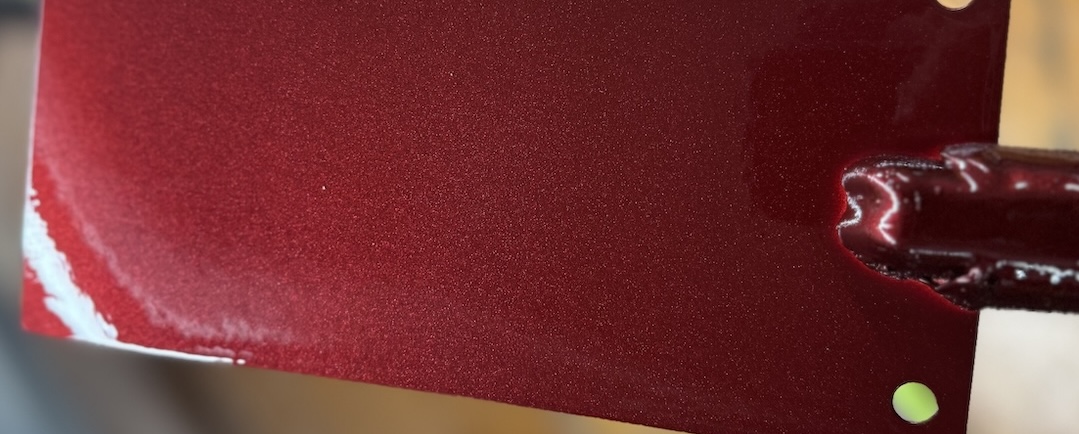
STEP 2 — Spray a Test Card
Confirm color match, spray pattern, and technique before painting your vehicle.
Part A — Prepare the Cans
Shake cans upside down to re-mix the contents.
Shake times:
Primer: 60 sec
Base color: 3 min
Clear coat: 60 sec
Spray a short burst from each can onto a clean surface to confirm that:
The nozzle is not clogged
The spray pattern is even
Atomization looks correct
Part B — Apply All Layers to the Test Card
Video: How to Spray a Test Card
Video: Control (or Drop) Coat Explained
Maintain a steady 6–8 inch spray distance with 50% overlap for smooth, even coverage.
If your repair requires primer, apply two light, even coats using steady, consistent motion.
Allow each coat to flash off for 5–10 minutes.
Apply light, even coats using consistent motion.
Allow each coat to flash off for 10–20 minutes.
Red and blue colors often need 4-5 coats because their pigments are more transparent.
Do these finishing passes only if your paint color is metallic, pearl, or tri-coat L2:
Hold the can slightly farther away (10-12 inches).
Spray a bit more slowly.
Apply 1–3 very light passes to help the reflective flakes settle evenly.
For tri-coat colors, add light L2 coats until the depth matches your vehicle under different lighting.
Apply full, wet coats with consistent motion and 50% overlapping strokes.
Allow each coat to flash off for 5–10 minutes.
Allow the card to fully dry before comparing the color.
Part C — Evaluate the Match
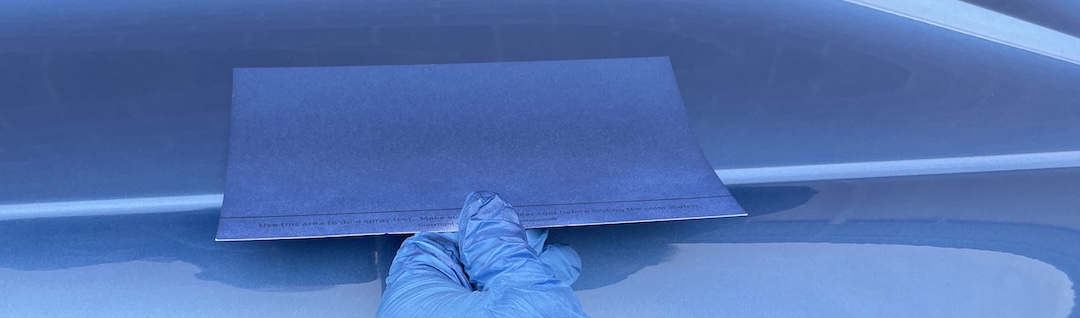
Hold the card next to your vehicle with similar orientation.
Compare in shade, daylight, and indirect light. If you don't see a match, contact customer support at support@scratcheshappen.com.
STEP 3 — Apply Primer and Base Color
Build smooth, even color coverage with correct spray technique and timing.
Part A — Primer (If Your Kit Includes Primer)
(If you realize now that you do need primer—such as when bare metal or plastic is visible—and your kit does not include it, you can order primer separately here. Not sure which primer shade is right? Just contact us at support@scratcheshappen.com)

Shake the can upside down for a full 60 seconds
Test spray onto a fresh card or masking paper to confirm clean atomization.
Variator nozzle adjustment on primer cans:
Turn the red nozzle dial clockwise to narrow the spray fan.
Turn the red nozzle dial counterclockwise to widen the spray fan.
Apply a light tack coat, followed by two medium coats.
Maintain 6–8 inches spray distance with 50% overlap.
Spray inward from the tape edge to avoid heavy buildup at the boundary.
Begin spraying off to the side and release the nozzle at the end of each stroke to prevent pooling.
Allow each coat to flash off for 5–10 minutes.
Use 600-grit (wet or dry) sandpaper to smooth the aerosol primer, remove nibs, and promote adhesion.
Use 1000-grit sandpaper to feather and blend the primer edges into the factory finish.
Apply base color after 60 minutes but within 24 hours.
Part B — Prep for Base Coat
Blow off sanding residue.
Lightly pass the tack cloth over the area.
The prep wipe may remove or streak the primer.
Part C — Base Color (L1 / L2)
Warm the can to room temperature if cold; cold paint thickens and may spatter.
Shake the can upside down for 3 minutes.
Test spray to confirm smooth atomization with no spatter.
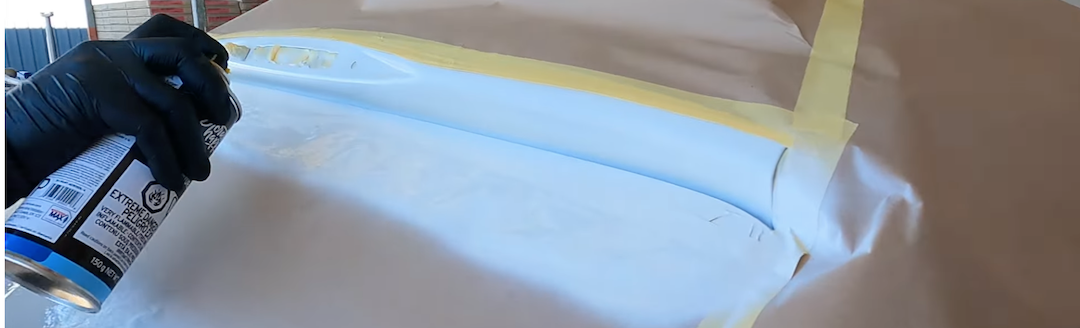
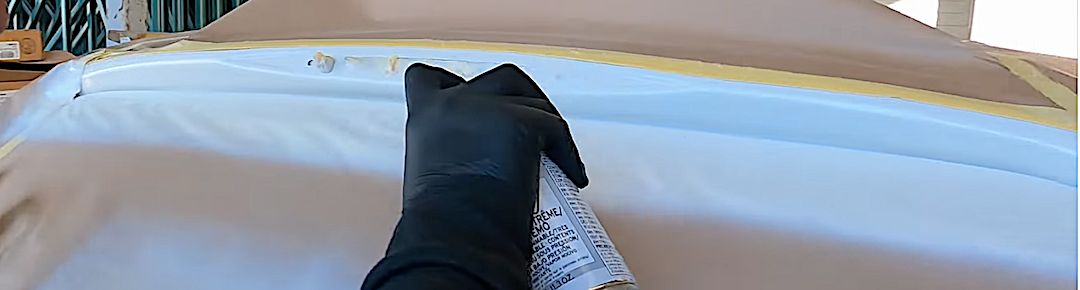
Spray 3–4 light-to-medium coverage coats at a 6–8 inch distance with 50% overlap.
Spray inward from the tape to avoid heavy buildup at the edge.
Begin spraying off to the side and release the nozzle at the end of each stroke to prevent pooling.
Maintain steady motion and consistent speed across all strokes.
Waterborne (P, I, U codes): Flash 10–20 minutes; hairdryer (no heat) may be used from 18 inches.
Solventborne (“S” code): Flash 10–20 minutes; Do not use a hairdryer.
Allow 30 minutes of dry time after your base color coats.
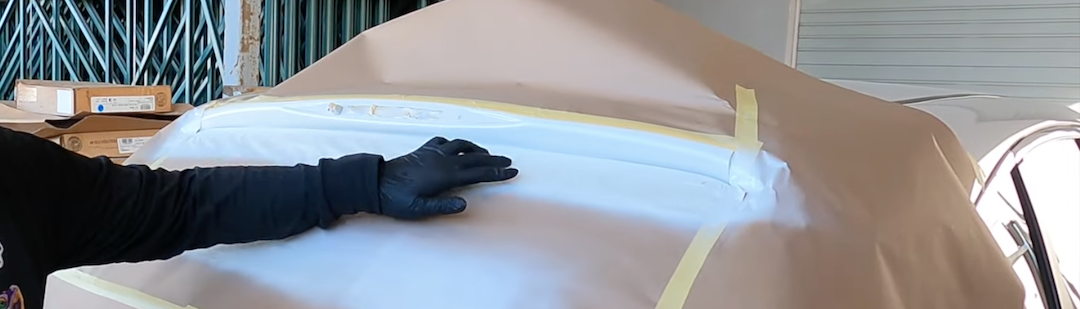
Spot dry-sand imperfections gently with 1000–1500 grit sandpaper.
Blow clean and tack the surface.
Spray one light additional coat to even out the repair area.
Do these finishing passes only if your paint color is metallic, pearl, or tri-coat L2:
Hold the can slightly farther away (10-12 inches).
Spray a bit more slowly for smooth flake orientation.
Apply 1–3 very light passes to help metallic/pearl flakes level evenly.
For tri-coat colors, apply light L2 coats until the depth and tone match your vehicle under different lighting.
Spray inward from the tape edge to avoid heavy buildup.
Apply clear coat after 60 minutes but within 24 hours.
STEP 4 — Apply Clear Coat and Finish
Seal the repair, restore gloss, and polish once the clear coat has fully cured.
Part A — Prep for Clear Coat
Lightly touch the masking paper near the repair to see if it's dry.
Tack the area to remove dust.
Ensure the base color is smooth and blemish-free.
Do not use the prep wipe on the base color.
Part B — Apply Clear Coat
Shake the can upside down for a full 60 seconds
Test spray onto the masking paper to confirm clean atomization.
Spray 2–3 medium-to-full coats (slightly heavier coverage than the base color) with 50% overlap.
Maintain a 8-10 inch distance and consistent motion.
Spray inward from the tape line to avoid heavy buildup.
Allow 5–10 minutes flash time between coats.
A hairdryer (no heat) may be used from 18 inches to assist drying.
Peel soft-edge tape right after the final coat to avoid a hardened paint edge.
Part C — Wet-Sand & Polish (after 72 hours) - Glossy Clear Coat
Wet-sand with 1500-grit sandpaper once the clear coat has fully cured (after 72 hours).
Optionally refine with 2000–3000 grit wet sandpaper for higher clarity and to add more gloss.
Polish with medium compound and a microfiber towel to achieve the final gloss.
Matte clear coats (FC01-FC05) should not be wet sanded or polished after the final coat or it will change the matte finish to glossy.
Part D — Aftercare
Hand wash after 72 hours.
Exposure to rain, snow, and ice after 48-72 hours.
Machine wash after 30 days.
Wax after 30 days.
Ceramic/film wrap after 60 days.
Troubleshooting
Humidity Issues
Waterborne Color Appearance
Color Shift Before Clear Coat
Runs or Sags
Splattering or Spitting
Cold Paint
L2 Paint Is Almost Translucent or a Little Bluish
If you need assistance:
USA: support@scratcheshappen.com Canada: support@scratcheshappen.ca
Related Help Docs & Videos
Learn more — from deciding if you need primer to applying your OEM-matched paint with confidence.
How to: Tips on Paint Application
View all knowledgebase Help articles on how to apply paint here.
When Should I Apply Primer?
Smart question! The answer depends on how deep the damage is.
How We Mix Your OEM-Matched Paint
See how our color experts hand-blend your paint for a precise match to your vehicle.