How To
My touch up paint job does not look very smooth. What can I do?
How to get a smoother finish on brush touch ups
Last updated on 17 Oct, 2025
Please read our detailed instructions for an in-depth explanation of how to get a smooth finish.
The first thing to keep in mind is that you are applying paint with an applicator, as opposed to spraying. So the paint won’t go on as smooth as a spray coat, but we can address the smoothness later, when it dries. As you apply the paint to your chip or scratch, try to keep it as even as possible with gentle strokes of the applicator.
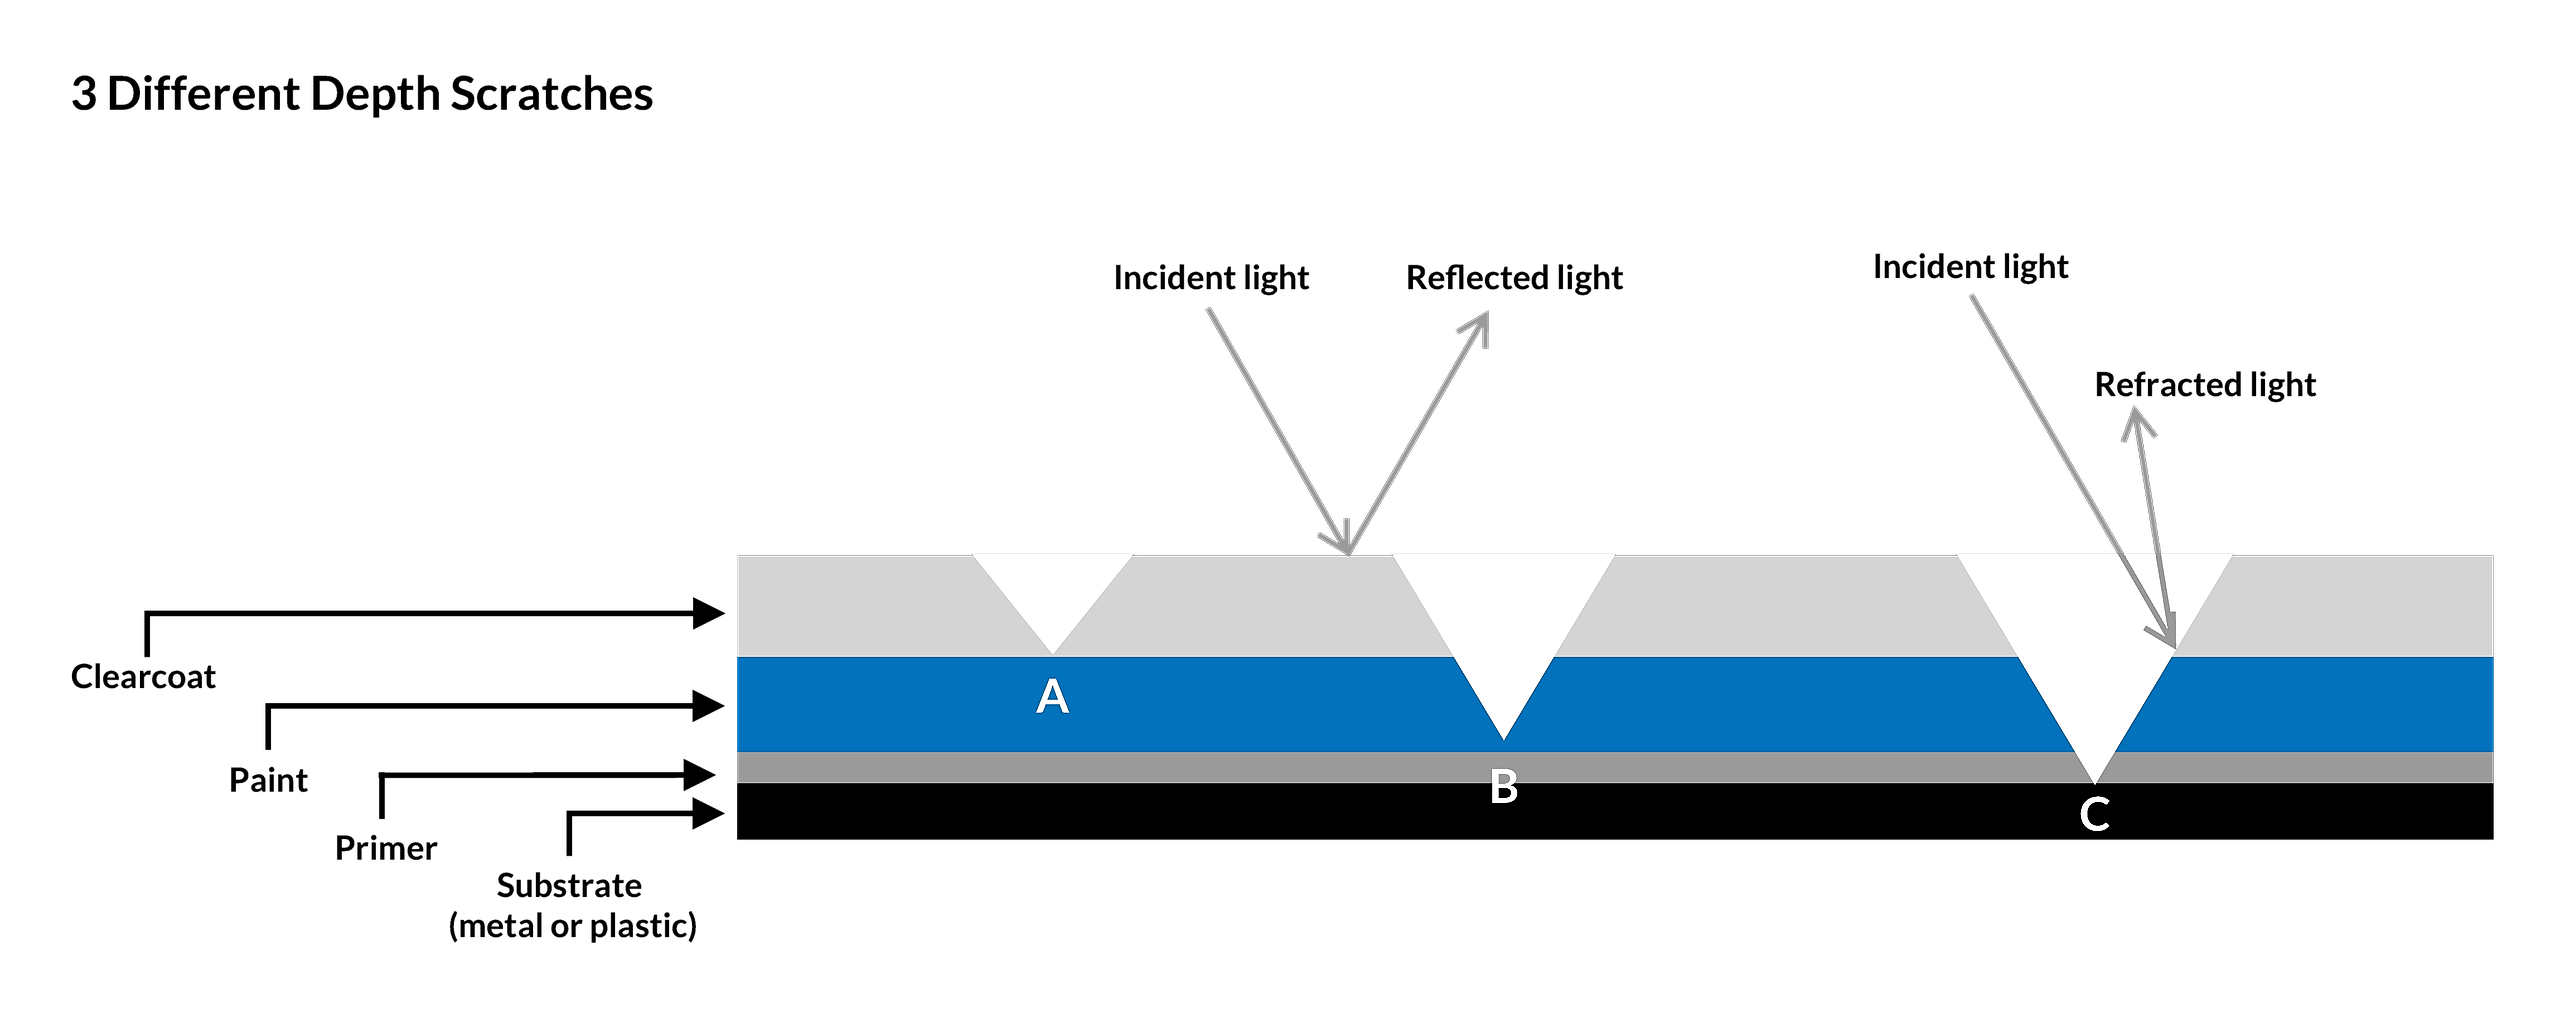
The second thing to keep in mind is that the “invisible-ness” of your repair is a function of two things: 1) color match; and 2) creating a level final surface so that reflected light does not get distorted by a chip or scratch that is lower or higher than the surrounding paint. Often, customers will put one coat of touch up paint in a deep scratch, and it will match the surrounding paint color, but it won’t fill in the scratch. So the scratch or chip is catching the reflected light and remains noticeable. You will need to either use primer as your first coat to fill in a deep blemish, or use multiple coats of paint to fill in, or in extreme cases, wet sand the scratch to smooth it out. However, note that when you wet sand, your repair area will get larger, and in many cases wet sanding is only done before aerosol spray touch ups.

Remember that paint is very thin, when properly applied it is only 5-10 microns thick, yet scratches are almost always deeper. So paint itself is often not enough to fill in a scratch.
Here are a few additional tips:
1. Don't apply heavy coats, and don't over-brush the paint. Apply thin coats, brush it on with minimal strokes, and let the paint level itself. See #3 below also. Try this on the test card to perfect your technique.
2. When applying paint and clear coat, try to minimize the amount of material that extends beyond your scratch. Less is more in this case, so try to apply the paint and clear coat just inside the the scratch. Here is an article with a little more detail on how to selectively remove excess paint (or clear coat) when it extends beyond the width of your scratch:
3. Try thinning the paint with 25% distilled water, it may flow better for smaller scratches. Here is an article on that:
https://help.scratcheshappen.com/help/tricks-for-super-small-chips-and-scratches
Achieving an invisible repair involves some techniques that depend on your scratch or chip, so don't be discouraged if it isn't perfect the first time around. Use the test card to practice.
Is spraying for me?
Some folks find that a brush repair just isn't good enough for the final result that they are looking for. In those cases, spraying is the only way to get it to blend. Our aerosol products produce excellent results. Airbrushes are pretty cheap ($100 usually) and are great for small repairs, especially small scuffs. But airbrushes do require thinning the paint, so that the paint atomizes. Airbrushes use a tiny amount of paint, and our 15ml paint bottles contain enough paint to airbrush quite a few scratches.

