Learn which sandpaper grit to use for each stage of your DIY touch-up or panel repair so you can achieve a smooth, professional-looking finish without damaging your paint.
This guidance applies to ScratchesHappen bottle and aerosol kit repairs, not professional spray-gun systems.
Section 0: Surface Prep, including Rust & Filler
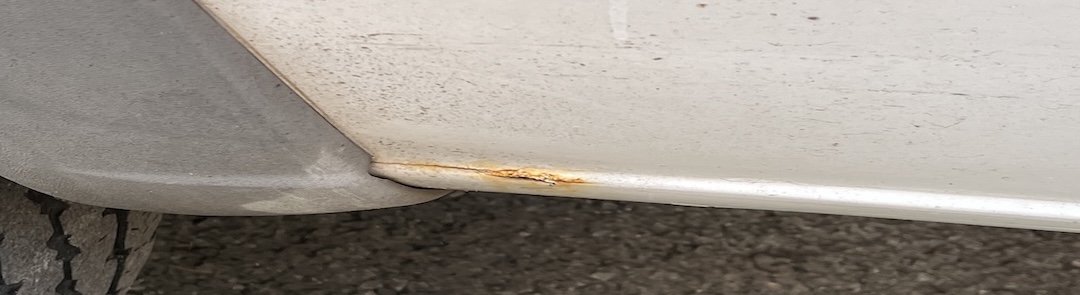
Before applying primer, make sure the surface is completely clean and free of rust or oxidation. Paint will not adhere properly to rusty or uneven surfaces.
RUST
Remove all rust using 80-grit sandpaper or a sanding block, extending beyond the damaged area to expose clean metal.
BODY FILLER
If the surface is uneven, apply automotive body filler (like the ScratchesHappen Body Filler Kit) in thin layers. Let each layer dry 10–15 minutes before sanding smooth.
Sand the filled area smooth with 320-grit to level, then finish with 600-grit to refine, and smooth out any scratches from the 320-grit, before priming.
Body filler and spot putty are always sanded dry. Wet sanding is used in other stages, not during filler shaping.
SURFACE PREP
Bottle kit surface prep: Use a 600-grit wet sanding block edge or sanding stick to remove any ragged, rough edges on the chip or scratch.
Aerosol kit surface prep: Use 600-grit paper to wet sand the area you are going to spray. This scuffing smooths out the surface, and preps it for good adhesion with the primer or paint.
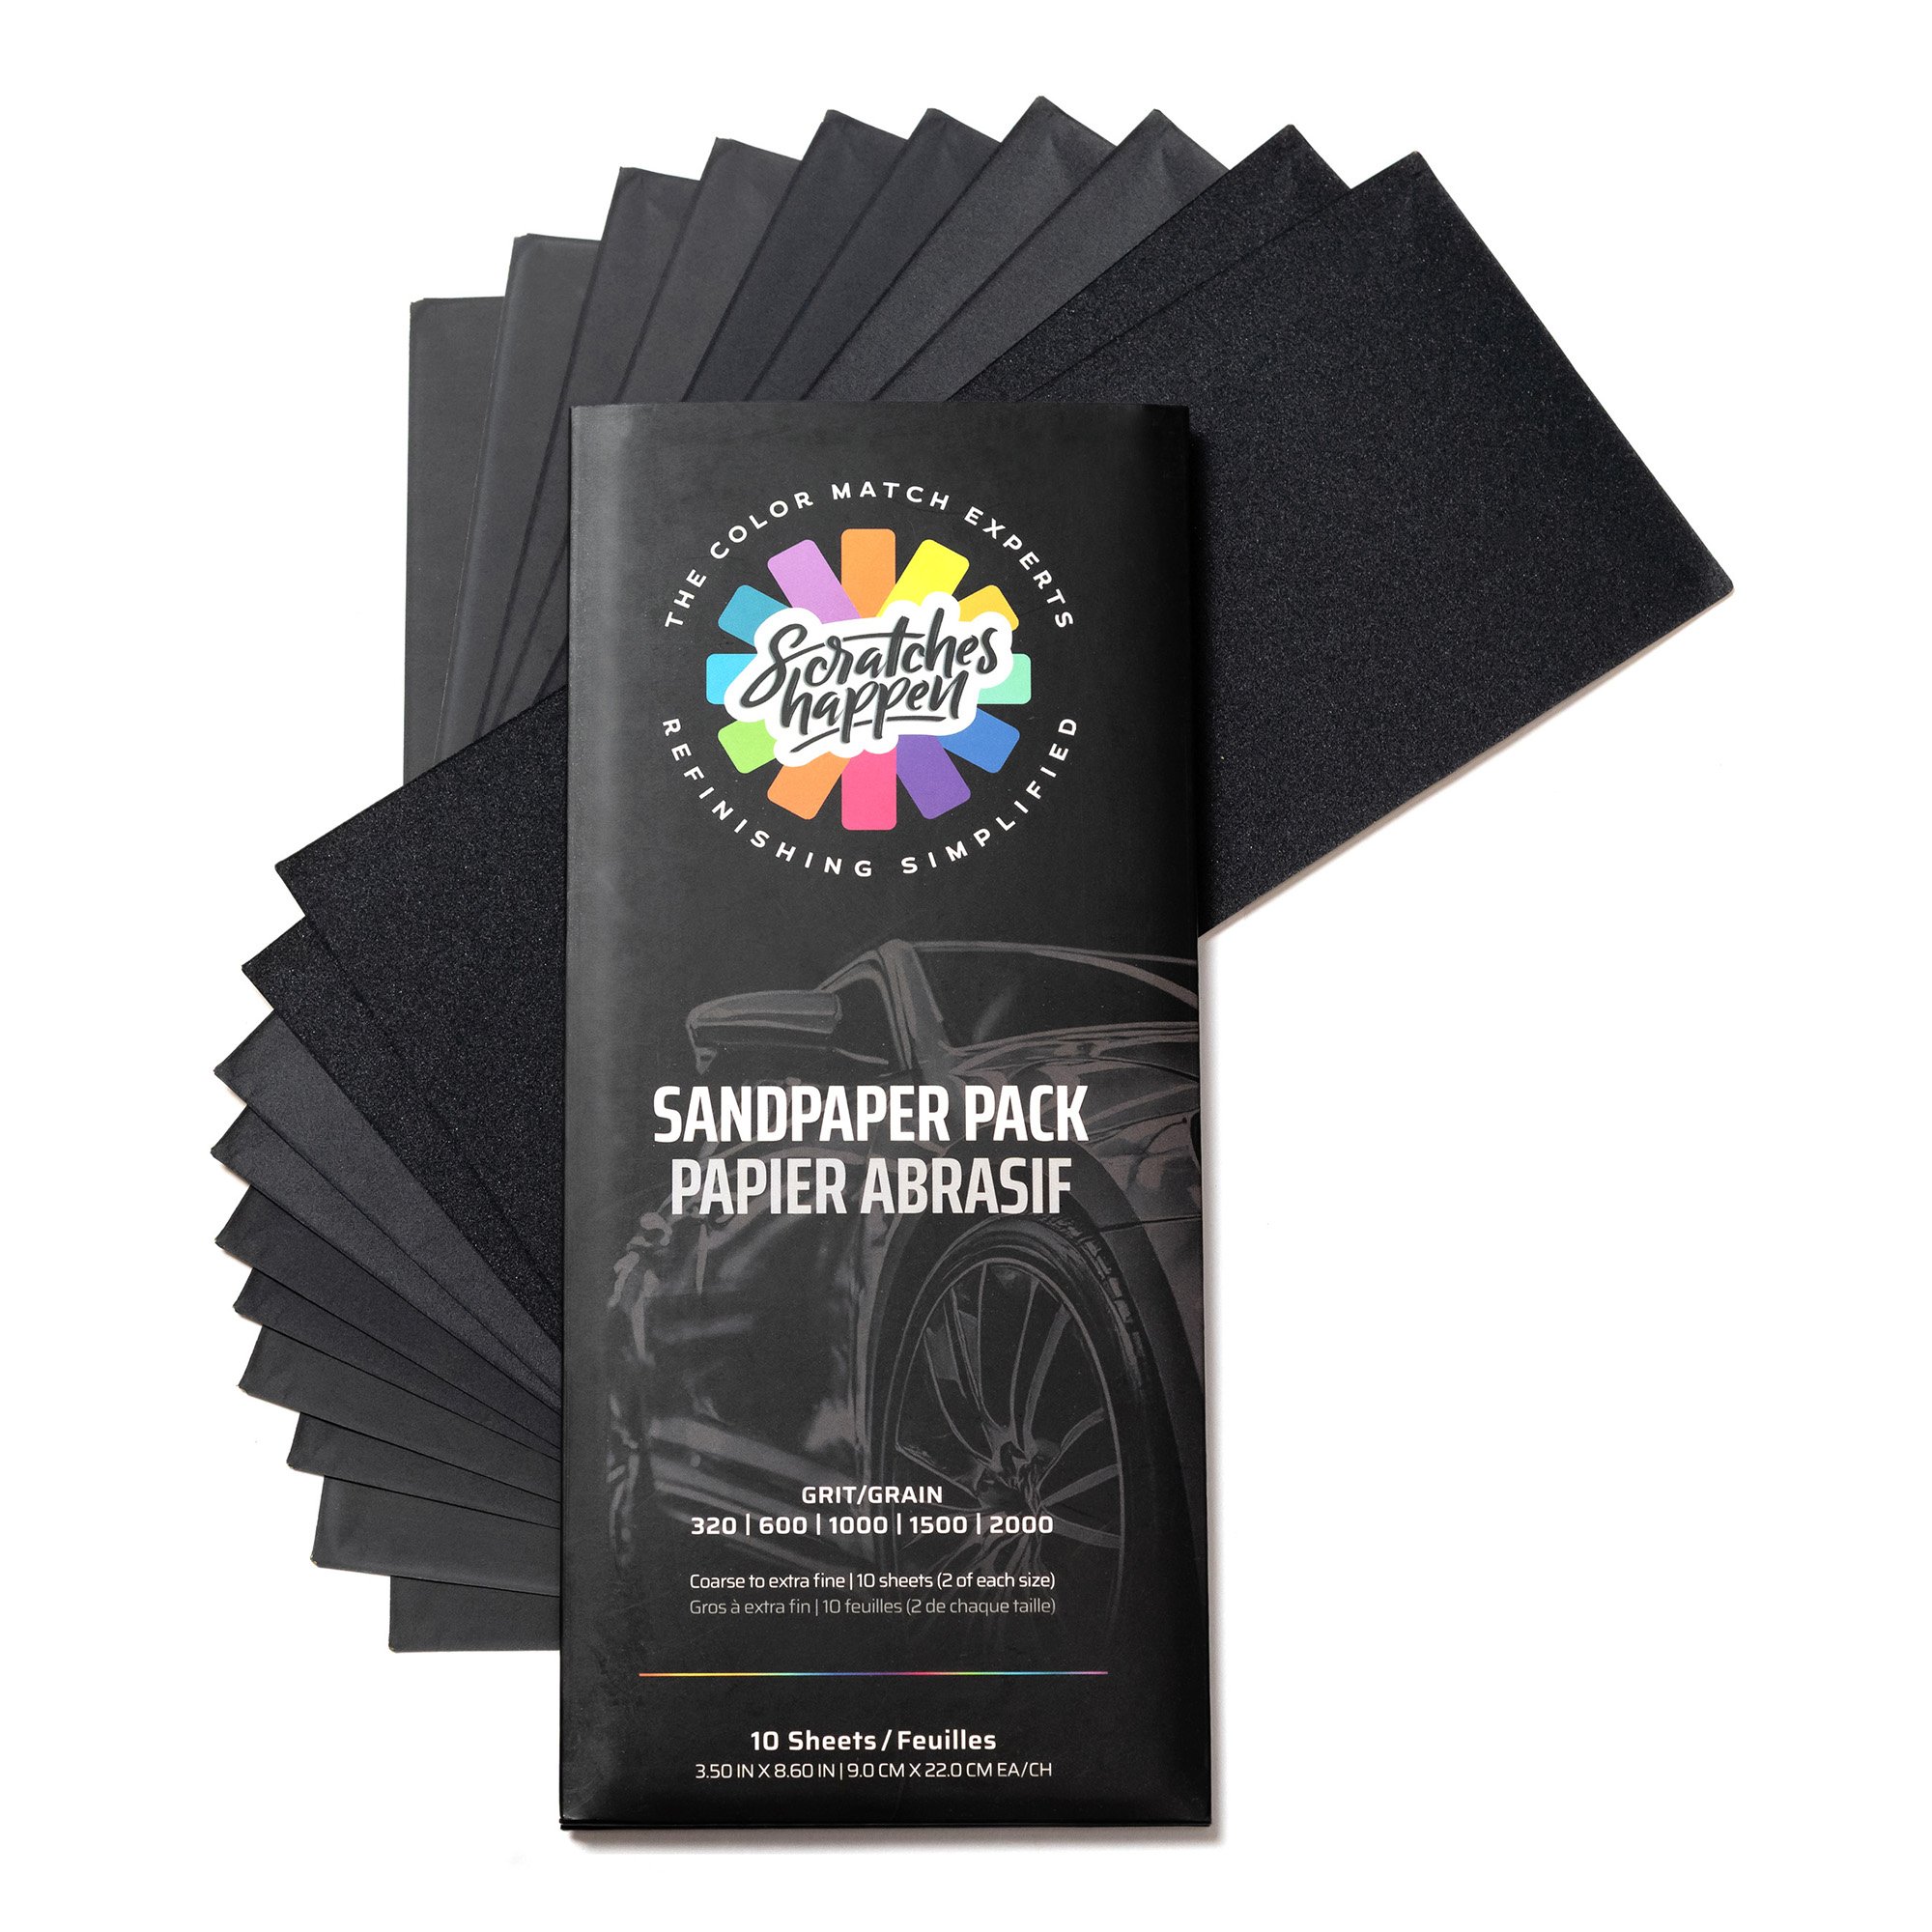 Need sandpaper?
Our USA Touch-Up Sandpaper Kit and Canada Touch-Up Sandpaper Kit include the same grits used in these steps (320, 600, 1000, 1500, and 3000) — ideal for both bottle and aerosol repairs.
Section 1: Primer Sanding
Bottle kit: Use 1000-grit dry sandpaper as needed to gently smooth any rough primer in small brush repairs.
Aerosol kit: Use 600-grit (wet or dry) sandpaper to smooth the aerosol primer. Use 1000-grit sandpaper to feather and blend the primer edges into the factory finish. The sanding/scuffing of the primer surface with 600-grit helps prepare it for good adhesion with the paint.
Section 2: Base Color Sanding
Bottle kit: Waterborne base coats are fragile. You can carefully spot DRY sand with 1000-grit sand paper as needed to smooth the dry paint. Apply at least one thin coat of paint afterward to cover any scratches from spot sanding.
Aerosol kit: If you notice a small blemish, blob or dust nib after spraying the aerosol base color coats:
Let the coat dry
Lightly dry-sand just the imperfection spot with 1000-grit sandpaper.
Blow with compressed air and tack cloth to remove dust.
Then, apply the final top coats of paint, which will fill in any scratches from the blemish spot sanding.
Section 3: Clear Coat Finishing
BOTTLE AND AEROSOL KIT REPAIRS:
Use 1500-grit (wet sanding) if needed to add gloss to the clear coat once it’s fully cured (usually 48 hours).
Follow with 2000-grit (wet) and then 3000-grit (wet) for polishing to a high gloss.
Tips & Cautions
Always sand with light, even pressure — let the paper do the work.
Check your progress frequently to make sure you don't sand through clear coat and paint inadvertently.
Replace wet sand paper frequently to prevent scratches.
Never sand while clear coat is tacky or partially cured.
FAQs
Do I need to sand between color coats?
What grit wet sandpaper should I use for clear coat finishing?
Can I use the same sandpaper or grit for primer and clear coat?
No, both the paper and grit should be different.
Primer sanding is a leveling step, using coarser (600-grit dry) paper.
Clear coat sanding is a polishing step, using fine (1500–3000-grit wet) paper. Always use clean, fresh paper for clear coat — residue from earlier steps can scratch or dull the finish.
Do these sanding guidelines cover professional spray-gun clear coats?
Related Help Docs & Videos
Learn what comes next — from prepping your surface to polishing your final finish.
ScratchesHappen Polishing Compound Instructions
ScratchesHappen Polishing Compound is a body-shop-safe finishing polish used to restore gloss and refine painted surfaces after automotive touch-up repairs.
ScratchesHappen Aerosol Instructions
Get professional results with the ScratchesHappen Aerosol Kit using these clear, step-by-step instructions.
How To Spray ScratchesHappen Touch Up Paint
See our technician prep, prime and paint a large flaking area on an SUV.